Is your mower not starting like it used to? The problem might be right at the battery terminals.
When these small parts wear out or get corroded, your mower struggles to get the power it needs. But don’t worry—you can fix this yourself. In this guide, you’ll learn exactly how to replace mower battery terminals quickly and safely.
By the end, you’ll have your mower running smoothly again, saving you time and money. Ready to get started? Let’s dive in!
Tools And Materials Needed
Gathering the right toolsis key for replacing mower battery terminals. Use a wrench or socket setto remove nuts and bolts. A screwdriverhelps loosen clamps. Wire strippers and crimpers prepare and secure wires. Protective gloveskeep hands safe. A multimeterchecks battery voltage and connection quality.
Choose terminals that match your mower’s battery size and wire gauge. Copper terminals are common for better conductivity. Make sure the terminals fit snugly over battery posts. Look for corrosion-resistant coatings for durability. Proper fit avoids loose connections and power loss.

Credit: www.youtube.com
Safety Precautions
Always disconnect the batterybefore working on mower battery terminals. This prevents electric shocksand short circuits. Remove the negative (-) terminalfirst, then the positive (+) terminal. Use tools with insulated handles to avoid accidents.
Wear protective gearto stay safe. Use glovesto protect hands from acid and sharp parts. Safety glassesshield eyes from sparks and debris. Long sleeves and pants protect skin from battery acid.
Removing Old Battery Terminals
Begin by disconnecting the mower battery to avoid sparks. Use a wrench to loosen and remove the old terminals carefully. Clean any corrosion before installing new battery terminals for a better connection.
Loosening Terminal Clamps
Turn off the mower. Wear gloves for protection. Use a wrenchto loosen the terminal clamps. Hold the clamp steady. Turn the wrench counterclockwise. This should loosen the clamp. Pull the clamp away gently. Be careful not to tug too hard. Repeat for the other terminal. Ensure both clamps are fully loose.
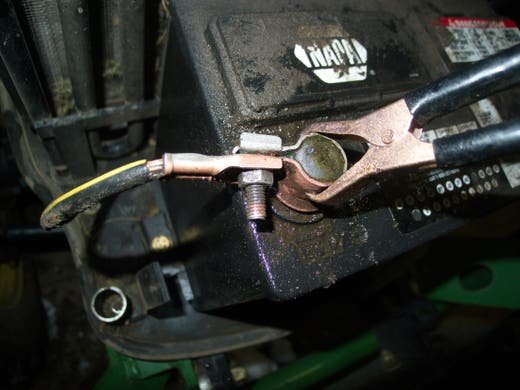
Cleaning Terminal Posts
Check the terminal posts. They might have corrosionor dirt. Use a wire brush to clean them. Brush gently around the posts. Remove all the dirt and rust. Make sure they look shiny and clean. A clean post ensures a good connection. Do this for both posts. Cleaning helps the battery work well.

Credit: www.youtube.com
Installing New Battery Terminals
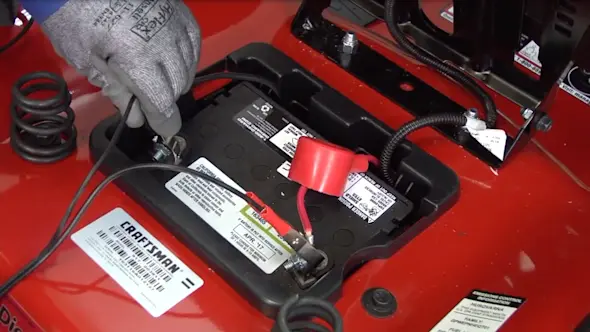
Start by placing the new battery terminals onto the battery posts carefully. Make sure each terminal fits snugly around the post. The positive terminal usually has a red cover or a plus sign (+). The negative terminal often has a black cover or a minus sign (−). Connect the correct terminal to the matching post to avoid damage.
Use a wrench or pliers to tighten the nuts on the terminals. Tighten them enough to hold firmly, but do not overtighten. Loose connections may cause poor performance. Too tight can damage the terminals or posts.
- Check that each terminal is secure and does not move.
- Ensure the battery cables are free from corrosion before attaching.
- Test the mower by starting it to confirm good electrical contact.
Testing The New Connections
Check the new terminals for a secure and snug fit. Loose connections can cause starting problemsor power loss. Make sure terminals are aligned properly with battery posts. Clean any dirt or corrosion before fitting.
Once connected, look for any movement or wiggle. Terminals should not shift when gently pulled. Tighten the clamps if needed to ensure a firm hold.
To start the mower, turn the key or press the start button. The engine should crank without hesitation. If the mower does not start, recheck the connections or clean the terminals again.
- Confirm terminals are tight and clean
- Check for no loose wires
- Test engine start immediately
- Listen for smooth engine crank
Credit: www.searspartsdirect.com
Maintenance Tips For Battery Terminals
Battery terminals need regular cleaningto work well. Dirt and grime can build up and stop the battery from giving power. Use a brush or cloth to wipe the terminals gently. Avoid using too much water because it may cause damage. Check the terminals often to keep them free from dirt.
Preventing corrosionhelps the battery last longer. Corrosion looks like white or green powder on the terminals. It can stop the mower from starting. Apply a thin layer of petroleum jelly or a special anti-corrosion spray on the terminals. This keeps moisture away and stops corrosion from forming. Clean the terminals before putting on the jelly or spray.
Frequently Asked Questions
How Do I Safely Remove Mower Battery Terminals?
First, turn off the mower and disconnect the negative terminal. Then, remove the positive terminal carefully. Use insulated tools to avoid sparks or shocks. Always wear protective gloves and goggles for safety.
What Tools Do I Need To Replace Battery Terminals?
You need a wrench or pliers, a wire brush, and replacement terminals. A screwdriver may help loosen terminal clamps. Having protective gloves and safety glasses is also important.
How To Clean Corroded Mower Battery Terminals?
Remove the terminals and scrub with a wire brush. Use a mixture of baking soda and water to neutralize corrosion. Rinse with water and dry thoroughly before reconnecting.
How To Choose The Right Replacement Terminals?
Check your mower’s battery size and terminal type. Match the new terminals with the original for a proper fit. Choose corrosion-resistant materials like brass or lead-coated terminals.
Conclusion
Replacing mower battery terminals can save time and money. It keeps your mower working well and starts easily. Clean terminals help power flow without problems. Always wear gloves and follow safety steps. Check connections often to avoid future issues. A little care goes a long way.
Now, you can handle this task with confidence. Your mower will run smoothly for many seasons. Simple steps, big results. Ready to get your mower back in shape?


