Is your zero turn mower not starting or running poorly? The battery might be the problem.
Replacing your mower’s battery may sound tricky, but it’s easier than you think—and it can save you time and money. In this guide, you’ll learn exactly how to replace your zero turn mower battery step-by-step. By the end, you’ll feel confident tackling the job yourself and getting your mower back to top performance.
Keep reading to discover simple tips that will make the process smooth and hassle-free.
Signs Of A Failing Battery
Recognizing the signs of a failing zero turn mower battery can save you from unexpected breakdowns and costly repairs. Batteries don’t always die suddenly; they often show subtle hints that signal their declining health. Paying attention to these signs can help you decide when it’s time to replace your battery, keeping your mower ready for action.
Slow Engine Start
Have you noticed your mower takes longer than usual to start? A slow engine crank is a classic sign of a weak battery. If you find yourself holding the key longer or hearing a sluggish turn-over, your battery might be struggling to provide enough power.
This delay can worsen over time, especially in cold weather. Don’t ignore these early warnings—catching them early prevents being stranded during important yard work.
Dimming Lights
Are the mower’s headlights or dashboard lights dimmer than before? Dimming lights often indicate your battery isn’t holding a full charge. This happens because the battery’s capacity to supply consistent voltage decreases as it ages.
Even if the engine starts fine, dim lights suggest the battery is weakening. Check your lights regularly; they can be a simple and effective way to monitor battery health.
Corrosion And Leaks
Take a close look at your battery terminals and surrounding area. White or greenish powdery buildup is corrosion, and it can block the flow of electricity. Corrosion not only affects battery performance but also damages the mower’s electrical system.
Leaks are another red flag. Any fluid escaping from the battery is hazardous and a sign that the battery case is cracked or damaged. If you spot corrosion or leaks, it’s time to replace the battery before it causes bigger problems.
Tools Needed For Replacement
Replacing the battery of a zero turn mower requires the right tools. Having these tools ready makes the task easier and faster. It also helps avoid damage to the mower or the new battery. Below are the essential tools needed for a smooth battery replacement process.
Basic Hand Tools
- Screwdrivers (flathead and Phillips) to remove covers and panels
- Wrenches or socket set to loosen and tighten battery terminals
- Pliers to hold nuts or remove clamps
- A wire brush to clean battery terminals and connectors
- A small container to keep screws and bolts safe
Safety Gear
- Safety gloves to protect hands from acid and sharp edges
- Safety goggles to shield eyes from battery acid splashes
- Long sleeves to prevent skin contact with battery acid
- A clean, dry cloth to wipe any spills or dirt
Preparing The Mower
Preparing your zero turn mower properly is essential before changing the battery. This step ensures safety and makes the process smoother. Take your time to get everything ready.
Turn Off And Disconnect
Make sure the mower is completely turned off. Remove the key from the ignition to prevent accidental starts. Disconnect the spark plug wire to stop any power flow. This step keeps you safe during the battery replacement.
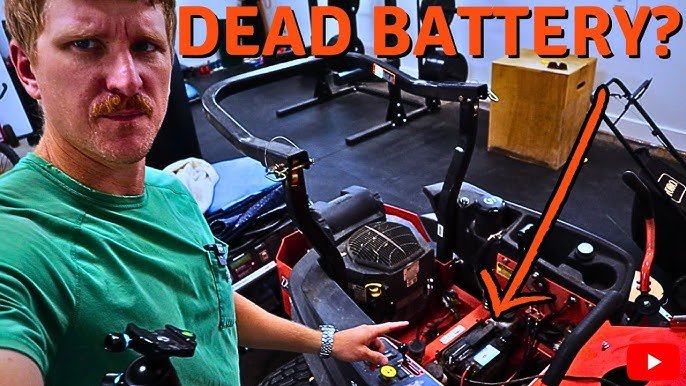
Locate The Battery
Find the battery compartment on your mower. It is usually under the seat or near the engine. Check your mower’s manual if you are unsure. Clear any debris or covers blocking access. Knowing the battery location speeds up the replacement process.

Credit: www.youtube.com
Removing The Old Battery
Removing the old battery from your zero turn mower is a task that requires care and attention. Handling the battery correctly ensures your safety and prevents damage to your mower. Let’s break down the process into clear, manageable actions.
Disconnecting Terminals
Start by turning off the mower and removing the key to prevent accidental starts. Locate the battery terminals—usually marked with a plus (+) for positive and minus (−) for negative.
Always disconnect the negative terminal first. This reduces the risk of electrical shorts. Use a wrench or socket to loosen the terminal clamp, then carefully lift the cable away from the battery post.
Next, disconnect the positive terminal in the same way. Keep the cables away from the battery to avoid accidental contact. Have you checked if your tools fit the terminal bolts? Using the right size makes this step much easier.
Lifting Out The Battery
Before lifting, check if the battery is secured with a bracket or strap. Remove any fasteners to free the battery. Batteries can be heavy and awkward, so prepare a firm grip.
Use both hands to lift the battery straight up and out of the compartment. Be mindful of any acid residues or corrosion—wear gloves if possible. How often have you found corrosion on your battery terminals? Cleaning it regularly can extend battery life.
Place the old battery on a stable surface away from children and pets. Recycling the battery responsibly is important, so plan to take it to a proper disposal facility. Handling the removal step carefully sets you up for a smooth battery replacement.
Choosing The Right Replacement Battery
Choosing the right replacement battery for your zero turn mower is crucial to keep it running smoothly and efficiently. Picking the wrong battery can lead to poor performance or even damage your mower’s electrical system. Understanding what battery specifications matter and the types of batteries available will help you make a smart choice that fits your mower’s needs.
Battery Specifications
Start by checking your mower’s manual for the exact battery specifications. You need to know the battery voltage, usually 12 volts, and the cold cranking amps (CCA) rating, which indicates how well the battery performs in cold weather. A higher CCA means better starting power, especially if you live in colder climates.
Capacity is measured in amp-hours (Ah), showing how long the battery can provide power before needing a recharge. Make sure the replacement battery matches or exceeds the Ah of your original battery to avoid running out of power mid-job. Also, pay attention to the battery size and terminal placement to ensure it fits perfectly in your mower’s battery compartment.
Types Of Batteries
You’ll mainly find three types of batteries for zero turn mowers:
- Lead-Acid Batteries:These are the most common and affordable. They require regular maintenance like checking water levels and cleaning terminals.
- Absorbent Glass Mat (AGM) Batteries:A sealed type of lead-acid battery that’s maintenance-free and more resistant to vibration. These tend to last longer and are a bit more expensive.
- Lithium-Ion Batteries:Lightweight and long-lasting with fast charging times. They cost more upfront but can save you money over time due to their durability and performance.
Think about how often you use your mower and the conditions it faces. If you only mow occasionally, a basic lead-acid battery might work fine. But if you rely on your mower heavily or in tough conditions, investing in an AGM or lithium-ion battery could pay off.

Credit: www.youtube.com
Installing The New Battery
Remove the old battery carefully and disconnect the cables. Place the new battery in the slot and connect the cables tightly. Secure the battery to prevent movement during use.
Replacing the battery in your zero turn mower might seem daunting, but with a bit of guidance, you can do it like a pro. Installing the new battery is a crucial part of the process. It ensures your mower runs smoothly and efficiently. This step is all about precision and patience. You’ll need to position the battery correctly and securely connect the terminals to get your mower back in action.Positioning The Battery
Begin by ensuring the battery tray is clean and free from debris. A clean tray prevents unnecessary wear and tear on the battery. Position the new battery in the tray so that the terminals are easily accessible. Verify that the battery is stable and doesn’t wobble. An unstable battery can lead to damage and poor performance. Consider using a battery strap or bracket to keep it secure.Connecting The Terminals
Now, focus on connecting the terminals. Begin with the positive terminal, usually marked with a “+” sign. Secure it tightly to ensure a strong connection. Then, connect the negative terminal, marked with a “-” sign. A loose connection can cause starting issues, so make sure it’s snug. Would you drive a car with loose wheels? Probably not, so treat your mower with the same care. Before wrapping up, double-check the connections. A quick inspection can save you from future headaches. Once everything looks good, you’re ready to test the mower. Feel the sense of accomplishment? You’ve just tackled a task many find daunting. With practice, these steps will become second nature, empowering you to maintain your mower with confidence.Post-installation Checks
After replacing the zero turn mower battery, it is important to perform some checks. These checks ensure the mower runs smoothly and safely. Proper post-installation inspection helps avoid future problems and saves time.
Testing The Mower Start
Turn the key to start the mower. Listen for a strong and steady sound from the engine. A quick start means the battery is working well. If the engine struggles or does not start, check the battery charge and connections. Try starting the mower several times to confirm consistent performance.
Inspecting Connections
Look closely at the battery terminals and cables. Make sure all connections are tight and clean. Loose or dirty terminals can cause poor power flow. Use a wrench to tighten any loose bolts. Wipe off any corrosion with a wire brush or cloth. Secure cables so they do not move or rub against sharp edges.
Battery Maintenance Tips
Keeping your zero turn mower’s battery in top shape takes more than just replacing it when it dies. Proper maintenance can extend the battery’s life and save you from unexpected breakdowns. Let’s dive into some practical tips that you can easily apply to keep your battery healthy and reliable.
Regular Cleaning
Battery terminals can collect dirt, grease, and corrosion, which disrupt power flow. Clean the terminals regularly using a mixture of baking soda and water, applied with a soft brush. Always disconnect the battery before cleaning to avoid sparks or short circuits.
After scrubbing, wipe the terminals dry and apply a thin layer of petroleum jelly or terminal protectant spray. This simple step helps prevent corrosion from returning quickly. Have you noticed your mower struggling on cold mornings? Corroded terminals might be the culprit.
Proper Storage
If you don’t use your mower for a while, the battery can lose its charge or get damaged. Store the battery in a cool, dry place away from direct sunlight and extreme temperatures. Avoid leaving the battery connected to the mower during long storage periods.
Consider using a trickle charger or battery maintainer to keep the charge steady without overcharging. This approach keeps the battery ready for action when you need it next. Have you ever grabbed your mower after winter only to find the battery completely dead? Proper storage can prevent that hassle.

Credit: www.youtube.com
Frequently Asked Questions
How Do I Know When To Replace My Zero Turn Mower Battery?
You should replace the battery if it won’t hold a charge or the mower starts slowly. Check for corrosion or leaks. Regular battery testing helps identify issues early, ensuring your mower runs smoothly.
What Tools Are Needed To Replace The Mower Battery?
You typically need a wrench or socket set to remove battery terminals. Safety gloves and eye protection are recommended. Having a multimeter helps test the new battery before installation.
Can I Use Any Battery For My Zero Turn Mower?
No, use the battery type specified in your mower’s manual. Using the wrong size or voltage can damage the mower’s electrical system. Always choose a battery designed for zero turn mowers.
How Do I Safely Remove The Old Mower Battery?
Turn off the mower and disconnect the negative (-) terminal first. Then remove the positive (+) terminal. Lift the battery carefully, avoiding acid spills. Dispose of the old battery at a recycling center.
Conclusion
Replacing your zero turn mower battery is simple and saves money. Follow each step carefully to avoid mistakes. Always wear safety gear before starting the job. Use the right tools for better results. Check the battery type to get the correct replacement.
Clean the terminals to keep good contact. Proper battery care extends the mower’s life. Regular checks help spot problems early. Enjoy smooth mowing with a fresh battery installed. Keep your mower ready for every season.