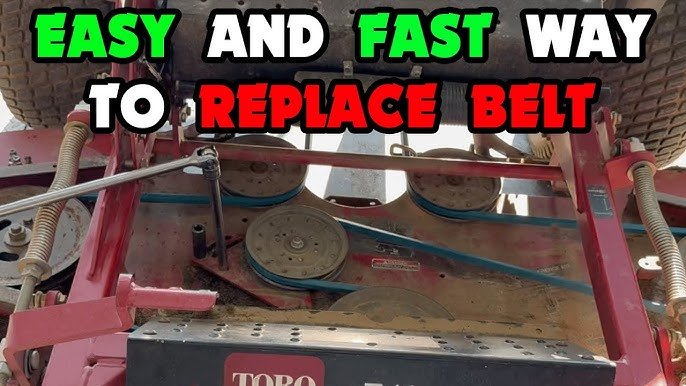
Is your Toro mower belt worn out or broken? If your mower isn’t cutting the grass like it used to, the belt might be the problem.
Replacing the mower belt yourself can save you time and money, but it might seem tricky if you’ve never done it before. Don’t worry—this guide will walk you through each step in a simple way, so you can get your mower back to working perfectly.
Keep reading, and you’ll learn how to replace your Toro mower belt quickly and easily.
Tools Needed
Replacing the mower belt on a Toro requires some basic tools. Having the right tools makes the job easier and faster. Each tool plays an important role in removing the old belt and installing the new one.
Prepare all tools before starting. This helps avoid interruptions during the work. The right tools also protect your mower from damage.
Socket Wrench Set
A socket wrench set helps remove bolts and nuts. Choose sizes that fit your mower’s parts. It allows you to loosen and tighten fasteners securely.
Flathead Screwdriver
A flathead screwdriver assists in prying or lifting parts gently. It helps to release clips or covers without scratching the mower.
Pliers
Pliers are useful for gripping and pulling belts or springs. They provide extra strength for tight spots.
Replacement Belt
Ensure you have the correct replacement belt for your Toro model. Using the right belt ensures smooth mower operation.
Work Gloves
Wear work gloves to protect your hands from sharp edges. Gloves improve grip and keep your hands clean.
Safety Precautions
Replacing the mower belt on your Toro mower requires careful attention to safety. Ignoring precautions can lead to injuries or damage to your equipment. Taking a few simple steps to protect yourself ensures a smoother and safer repair process.
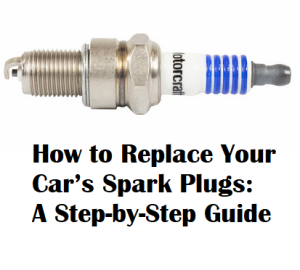
Disconnect The Spark Plug Wire
Always start by disconnecting the spark plug wire. This prevents the mower from accidentally starting while you’re working on it. Even if the mower is off, a sudden start can cause serious harm.
Wear Protective Gear
Use gloves to protect your hands from sharp edges and hot parts. Safety glasses shield your eyes from debris or accidental belt snaps. Don’t skip these basic protections—they can save you from unexpected injuries.
Work On A Flat, Stable Surface
Place your mower on a flat, stable surface before beginning. This prevents it from tipping over while you replace the belt. You want your workspace to be as safe as possible to avoid accidents.
Use Proper Tools
Using the right tools keeps the job safe and efficient. Avoid makeshift tools that can slip or break. Have a socket wrench, screwdrivers, and pliers ready for the task.
Keep Children And Pets Away
Make sure children and pets are not near your work area. Distractions or sudden movements can cause accidents. Your focus should be entirely on the task at hand.
Check For Hot Engine Parts
Before you start, ensure the engine has cooled down completely. Hot engine parts can cause burns if touched. Give your mower enough time to rest after use before you dive into repairs.
Locate The Mower Belt
Finding the mower belt on your Toro mower is the first step in replacement. The belt plays a key role in transferring power from the engine to the blades. Knowing its exact location helps you avoid confusion during the repair.
Most Toro mowers have the belt placed near the cutting deck or under the mower’s body. It loops around the pulleys and connects the engine to the blade spindle. The belt looks like a flat or V-shaped rubber strip.
Before searching, ensure the mower is off and cooled down. This prevents injury and allows safe inspection.
Check Under The Mower Deck
Lift the mower deck or use the deck height adjustment to raise it. Look underneath for a long, looped belt around metal pulleys. This belt drives the blades and is often visible from below.
Remove The Protective Covers
Some Toro models have covers or guards over the belt area. Use a screwdriver or wrench to remove these covers. This gives better access and a clear view of the belt’s path.
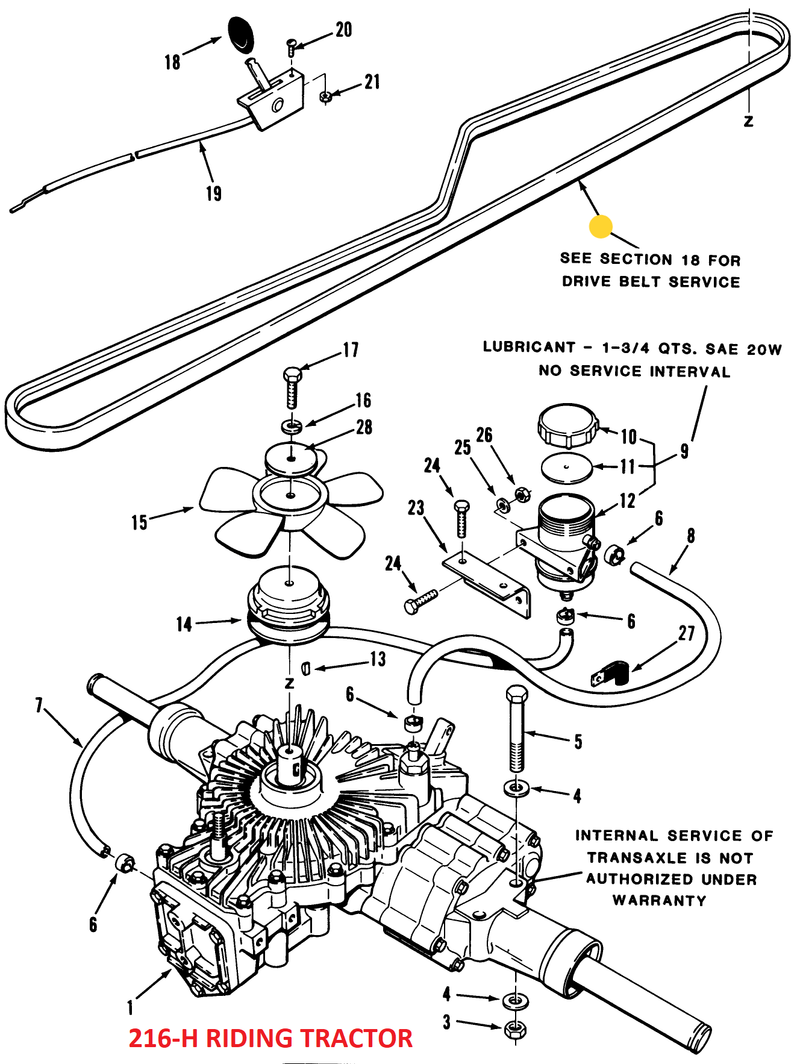
Refer To The Mower’s Manual
The owner’s manual shows diagrams and parts locations. Check the belt section for exact placement. It helps identify the belt and related components quickly.
Identify Belt Types And Shapes
- Flat belts: Smooth and wide, usually found on older models.
- V-belts: Triangular cross-section, common on many Toro mowers.
Knowing the belt type aids in finding and selecting the correct replacement.
Credit: hillyridge.com
Remove The Old Belt
Begin by disconnecting the mower’s spark plug for safety. Loosen the belt tensioner and carefully slide off the old belt from the pulleys. Ensure all parts are clean before removing the belt completely.
Replacing the mower belt on your Toro can seem daunting, but breaking it down into manageable steps makes the task straightforward. One of the crucial steps is removing the old belt. This involves a few critical actions to ensure safety and ease. Let’s dive into each part of this process so you can get your mower back in action without a hitch.Disconnect Power Source
Safety first! Before you do anything else, disconnect the power source to prevent any accidental start-ups. If your mower is electric, unplug it from the power outlet. For gas mowers, remove the spark plug wire to ensure the engine doesn’t accidentally turn over. This simple step protects you from unexpected accidents and keeps your work environment safe.Remove Deck Covers
Next, you need to remove the deck covers to access the belt. These covers are usually held in place by screws or bolts. Grab a wrench or screwdriver to loosen and remove them. Keep these small parts in a safe place so you can easily reattach them later. With the deck covers off, you’ll have a clear view of the belt and pulleys.Release Belt Tension
Now, it’s time to release the belt tension. Locate the tensioner pulley, which keeps the belt tight. Gently push or pull the tensioner to loosen the belt. It may require a bit of elbow grease, but take your time. Once the tension is released, you can slide the belt off the pulleys. Have you ever wondered why these simple maintenance tasks can extend the life of your mower? Taking the time to properly maintain your equipment not only saves you money but also ensures a smoother mowing experience. Now that you’ve removed the old belt, you’re one step closer to a fully functional mower.Inspect The Pulleys
Inspecting the pulleys is a crucial step before replacing the mower belt on your Toro. Pulleys guide and support the belt, so any damage can cause belt problems or mower failure.
Check each pulley carefully for wear, cracks, or debris. Clean pulleys help the belt run smoothly and extend its life. A worn pulley can cause slipping or uneven belt tension.
Use a flashlight to see hard-to-reach areas. Rotate the pulleys by hand to feel for rough spots or wobbling. Proper pulley alignment is essential to prevent belt damage.
Check For Visible Damage
- Look for cracks or chips on the pulley surface
- Inspect for rust or corrosion that can weaken the pulley
- Remove any dirt, grass, or debris stuck on the pulley
Test Pulley Movement
- Spin each pulley slowly by hand
- Listen for grinding or squeaking noises
- Feel for smooth, even rotation without wobbling
Ensure Proper Alignment
- Check if pulleys line up straight with the belt path
- Misaligned pulleys can cause the belt to slip off
- Use a straight edge or ruler to verify pulley alignment

Credit: www.youtube.com
Install The New Belt
Installing the new belt on your Toro mower is a key step to get it running smoothly again. This part requires careful attention to ensure the belt fits well and works properly with the pulleys. Handling this correctly can save you time and avoid damage to your mower’s engine and blade system.
Position Belt On Pulleys
Start by placing the new belt around the main pulley closest to the engine. Make sure the belt sits firmly in the groove without twisting or overlapping itself.
Next, guide the belt onto the idler pulley and the blade pulley. Take your time to confirm each pulley’s groove is fully engaged with the belt. You might need to rotate the pulleys slightly to help the belt settle correctly.
Have you noticed how a misaligned belt can cause unusual noises or uneven blade movement? Positioning it perfectly avoids these problems and extends the belt’s life.
Adjust Belt Tension
Proper tension is essential for the belt to transfer power efficiently. Too tight, and it might wear out quickly or strain the mower’s components. Too loose, and it could slip off or reduce cutting performance.
Use the tensioner arm or adjust the idler pulley to set the right tightness. You want the belt to have just a bit of give—about half an inch of play when pressed with your finger.
Check the mower’s manual if you’re unsure about the exact tension. After adjusting, spin the blade by hand to feel if the belt stays in place without slipping.
Reassemble The Mower
Reassembling your Toro mower after replacing the belt is a crucial final step. Proper reassembly ensures the mower works safely and efficiently. Take your time to fit each part back carefully. This will help avoid damage and keep the mower running smoothly.
Replace The Belt Cover
Start by putting the belt cover back in place. Align it correctly over the pulley and belt area. Secure the cover with the screws or bolts you removed earlier. Tighten them firmly but do not overtighten to avoid stripping the threads.
Reattach The Wheels
If you removed any wheels, now is the time to put them back. Slide the wheels onto the axles and secure them with the pins or clips. Make sure the wheels spin freely without wobbling. Check that the locking mechanisms hold the wheels firmly.
Reconnect The Drive Belt
Place the drive belt around the pulleys exactly as it was before removal. Check the belt’s tension to ensure it is not too tight or loose. Adjust the tensioner if your mower has one. Proper tension helps the mower move without slipping.
Secure The Engine Cover
Put the engine cover back on to protect the internal parts. Align the cover and fasten it with screws. This keeps dirt and debris out, protecting the engine’s performance. Make sure all parts fit snugly and nothing is loose.
Final Safety Check
- Look over all reassembled parts carefully.
- Check that all screws and bolts are tight.
- Ensure the belt runs smoothly on the pulleys.
- Test the mower controls before starting.
- Wear safety gear when testing the mower.
Completing these steps correctly helps your Toro mower work well. It also reduces the risk of damage or injury during use.
Test The Mower
Testing your Toro mower after replacing the belt is crucial to ensure everything runs smoothly. This step confirms that the belt is properly installed and that your mower is ready for the next cut. Skipping this test can lead to unexpected breakdowns and wasted time.
Start The Engine Safely
Before you start, clear the area around your mower to avoid any hazards. Turn on the mower while keeping your hands and feet away from moving parts. Listen carefully for any unusual noises that might indicate the belt isn’t seated correctly.
Engage The Blades And Check Belt Movement
Engage the mower blades and observe the belt through any accessible openings. The belt should move smoothly without slipping or jerking. If you notice any irregular motion, stop the engine immediately and inspect the belt tension and alignment.
Test The Mower’s Performance On Grass
Take your mower for a short test cut on a patch of grass. Pay attention to how the blades cut and whether the mower maintains consistent power. Uneven cutting or loss of power can signal a belt issue that needs adjustment.
Inspect For Heat Or Smell
After running the mower for a few minutes, feel near the belt area for excessive heat. A burning smell or hot belt surface can mean the belt is too tight or rubbing against a pulley incorrectly. Adjust the belt tension if you detect any of these warning signs.
Final Safety Check
Once satisfied with the mower’s operation, turn it off and perform a quick safety check. Ensure all protective covers are securely in place and that the belt remains tight. This final step prevents accidents and keeps your mower in great shape for future use.
Common Issues And Fixes
Common mower belt problems include slipping, cracking, or breaking. Tightening the belt and replacing worn parts can restore smooth operation quickly. Proper tension and alignment prevent frequent issues and extend belt life.
Replacing a mower belt on a Toro can present common challenges. Understanding these issues helps in preventing them. It also aids in finding effective solutions. Proper maintenance and timely fixes extend the life of your mower.Loose Or Worn-out Belt
A loose belt may cause poor performance. It can slip off during mowing. Regularly inspect the belt for wear. Replace it if necessary. A worn belt affects the mower’s efficiency.Belt Slipping Off
If the belt slips off, check the pulleys. They might be misaligned. Make sure the belt is properly tensioned. A well-aligned belt stays in place.Cracked Or Damaged Belt
Cracks in the belt can lead to breakage. Inspect the belt for visible damage. Replace it immediately if you find any. A damaged belt may cause mowing interruptions.Poor Belt Alignment
Misalignment can cause the belt to wear quickly. Check pulley alignment regularly. Adjust them to ensure the belt runs smoothly. Proper alignment reduces wear and tear.Inadequate Tension
Insufficient tension causes the belt to slip. This affects the mower’s cutting power. Adjust the tension according to the manual. Correct tension ensures optimal performance.Installation Errors
Incorrect installation can lead to belt damage. Follow the manufacturer’s instructions closely. Ensure the belt is installed properly. Correct installation prevents future issues.
Credit: www.reddit.com
Frequently Asked Questions
How Do I Know When To Replace My Toro Mower Belt?
Signs include slipping, squealing noises, or visible cracks. If the belt looks worn or frayed, it’s time to replace it. Regular inspection ensures optimal mower performance and prevents breakdowns.
What Tools Are Needed To Replace A Toro Mower Belt?
You’ll typically need a socket wrench, screwdriver, and pliers. Some models may require a belt tensioner tool. Always check your mower’s manual for specific tool requirements.
How Long Does It Take To Replace A Toro Mower Belt?
On average, it takes about 20 to 30 minutes. This depends on your experience and mower model. Following step-by-step instructions can speed up the process.
Can I Use Any Replacement Belt For My Toro Mower?
No, always use a belt designed for your specific Toro model. Using incorrect belts can cause poor performance and damage. Check the manual or parts list for the right belt.
Conclusion
Replacing the mower belt on your Toro is simple and quick. Follow the steps carefully to avoid mistakes. Check the belt condition regularly to keep your mower working well. A new belt helps your mower cut grass smoothly. Save time and money by doing this yourself.
Keep your Toro mower ready for every job. Small maintenance makes a big difference. Enjoy a clean, neat lawn all season long.