Is your mower acting up or won’t start? The problem might be right where the power begins—your battery terminals.
When these small but crucial parts wear out or get dirty, your mower can lose its spark. Don’t let a simple issue keep you from a perfect lawn. In this guide, you’ll learn exactly how to replace mower battery terminals quickly and safely, even if you’ve never done it before.
Stick with me, and by the end, you’ll have your mower running smoothly again—no costly repairs needed. Let’s get started!

Credit: www.youtube.com
Signs Of Worn Battery Terminals
Worn battery terminals can cause mower problems. Identifying signs early helps avoid bigger issues. Watch for visible changes and connection problems. These signs show when terminals need attention or replacement.
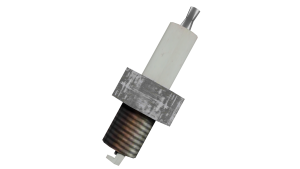
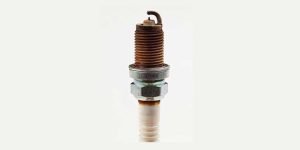
Corrosion And Rust Indicators
Corrosion looks like white, green, or blue powder on terminals. Rust appears as brown or reddish flakes. Both reduce battery contact and power flow. Clean terminals often to prevent damage and poor mower start.
Corrosion often forms near battery posts and cable clamps. It happens from battery acid leaking or moisture exposure. Rust grows when metal parts stay wet or exposed to air. Check terminals regularly for these signs.
Loose Or Damaged Connections
Loose terminals cause mower to start slowly or not at all. Wiggle the cable clamp to see if it moves easily. Damaged connections may show cracks or broken clamps. These stop power from reaching the mower’s engine.
Loose or broken terminals create sparks or electrical shorts. Tighten clamps firmly but avoid over-tightening. Replace any cracked or worn parts to ensure good contact. Reliable connections keep your mower running smoothly.
Credit: www.searspartsdirect.com
Tools And Materials Needed
Replacing mower battery terminals needs specific tools and materials. Having them ready makes the task easier and safer. This section lists all you need before starting.
Essential Tools List
- Wrench set – to loosen and tighten terminal nuts
- Screwdrivers – flathead and Phillips for terminal screws
- Wire brush – to clean corrosion from terminals and cables
- Battery terminal puller – helps remove stuck terminals safely
- Replacement battery terminals – match the size and type of your mower’s battery
- Electrical tape – to insulate connections after replacement
- Multimeter – to check battery voltage and terminal connectivity
- Needle-nose pliers – useful for bending or adjusting terminal clamps
Safety Gear Requirements
- Safety goggles – protect eyes from sparks or debris
- Rubber gloves – prevent electrical shocks and protect skin
- Long-sleeve shirt – guards arms from accidental contact with acid or sparks
- Closed-toe shoes – protect feet from falling tools or battery parts
- Well-ventilated area – avoid inhaling battery fumes during work
Preparing The Mower
Preparing your mower before replacing the battery terminals is essential for safety and efficiency. Taking the right steps ensures you avoid accidents and damage to your mower’s electrical system. Let’s look closely at what you need to do before handling those terminals.
Powering Down And Disconnecting Battery
Start by making sure your mower is completely powered off. Remove the key from the ignition to prevent any accidental starts. Then, locate the battery and disconnect the negative terminal first—this reduces the risk of short circuits.
Disconnecting the battery might feel like a small step, but it’s crucial. Have you ever experienced a sudden spark while working on electrical components? Avoid that risk by always disconnecting the negative terminal before the positive one.
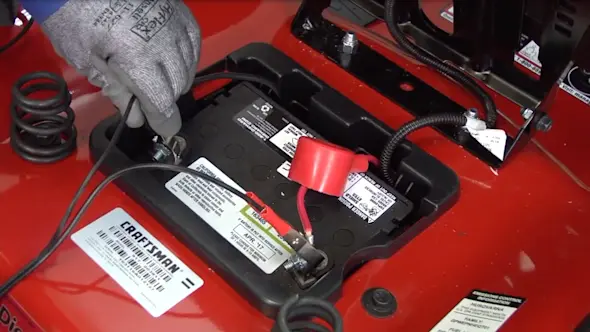
Locating The Battery Terminals
Once the mower is off and the battery is disconnected, find the battery terminals. These are usually on top of the battery and marked with “+” for positive and “-” for negative. If your terminals are covered with plastic caps, remove them carefully.
Check the terminals for corrosion or dirt before proceeding. A quick clean-up at this stage can make the replacement process smoother and extend the life of your new terminals. Have you noticed how a clean workspace speeds up your repairs?

Credit: www.youtube.com
Removing Old Battery Terminals
Old battery terminals often get corroded and block power flow. Carefully loosen and remove these terminals to prepare for new ones. This step ensures better connection and longer battery life.
Removing old battery terminals is a crucial step in maintaining your lawn mower. This task ensures the electrical system runs smoothly. Proper removal prevents damage to the battery and mower.Cleaning The Terminal Area
Before removing terminals, clean the surrounding area. Dirt and debris can interfere. Use a wire brush or old toothbrush. Gently scrub away any corrosion. A mixture of baking soda and water works well. Apply it with a cloth to clean tough spots. Ensure the area is dry before proceeding.Detaching The Terminals Safely
Safety is key when detaching terminals. Wear gloves to protect your hands. Disconnect the negative terminal first. This prevents electrical shock. Use a wrench to loosen the nut. Remove the cable carefully. Repeat the process for the positive terminal. Store removed parts safely to prevent loss.Installing New Battery Terminals
Installing new battery terminals is a key step to ensure your mower starts reliably every time. It’s not just about swapping old parts; the right terminals and a secure fit make all the difference in performance and safety. Let’s look at how to choose the best replacements and attach them properly to your battery.
Choosing The Right Replacement Terminals
Picking the right terminals can feel tricky, but matching them to your battery type and cable size is crucial. Look for terminals that fit snugly on your battery posts and connect well with your mower’s cables.
Consider the material too—lead terminals resist corrosion, but brass or copper options offer better conductivity. If you want terminals that last longer in wet or humid conditions, choose ones with protective coatings.
Have you checked your mower’s manual for specific recommendations? Using the exact type avoids compatibility problems and keeps your mower running smoothly.
Securing Terminals To Battery Posts
Once you have the right terminals, attaching them firmly prevents loose connections that cause starting issues. Begin by cleaning the battery posts and terminal clamps to remove any corrosion or dirt.
Slide the new terminal onto the battery post, then tighten the clamp bolt evenly. Don’t overtighten—it can crack the terminal—but make sure it’s snug enough that it won’t wiggle or come loose during use.
To avoid future corrosion, apply a thin layer of dielectric grease or petroleum jelly around the connection. This little step can save you from troubleshooting electrical problems down the road.
Testing And Maintenance Tips
Testing and maintaining your mower’s battery terminals is key to keeping your machine running smoothly. Without regular checks, small issues like loose connections or early corrosion can cause bigger problems. Let’s look at how you can ensure your battery terminals stay reliable and clean for longer.
Ensuring Proper Electrical Connection
Start by inspecting the terminals for any signs of wear or damage. A loose connection can prevent your mower from starting or cause inconsistent power delivery.
Use a multimeter to check the voltage across the terminals. If the reading is lower than the battery’s rated voltage, it might indicate a poor connection.
Make sure the terminals are tight but avoid over-tightening, which can strip threads or damage cables. If you notice any frayed wires, replace them immediately to avoid electrical shorts.
Preventing Future Corrosion
Corrosion is a common culprit behind poor terminal performance. After cleaning the terminals, apply a thin layer of petroleum jelly or a dedicated battery terminal protectant to keep moisture away.
Check your battery regularly, especially after heavy rain or mowing in wet conditions. Even small amounts of moisture can speed up corrosion.
Have you ever wondered why some batteries last longer despite similar usage? Often, it’s the small habit of applying anti-corrosion spray that makes all the difference. Try adding this step to your routine and see how much smoother your mower runs.
Frequently Asked Questions
How Do I Safely Remove Mower Battery Terminals?
First, turn off the mower and disconnect the negative terminal. Then, remove the positive terminal carefully to avoid sparks or damage.
What Tools Are Needed To Replace Mower Battery Terminals?
You typically need a wrench, wire brush, and replacement terminals. These tools ensure a secure and clean connection.
How Can I Clean Corroded Mower Battery Terminals?
Use a mixture of baking soda and water with a wire brush. Scrub gently to remove corrosion and rinse with clean water.
How Do I Connect New Mower Battery Terminals Correctly?
Attach the positive terminal first, then the negative. Ensure connections are tight to prevent electrical issues.
Conclusion
Replacing mower battery terminals is a simple task anyone can do. Start by disconnecting the old terminals carefully. Clean the battery posts to remove dirt and corrosion. Attach the new terminals tightly to ensure a good connection. Test the mower to check if it starts well.
Regular maintenance helps your mower work longer and better. Keep your tools ready and follow safety steps always. You save money and avoid delays by doing this yourself. A little care goes a long way in keeping your mower strong.