Is your mower battery charger not working anymore? If you rely on your mower to keep your lawn looking great, a dead charger can quickly become a big problem.
But don’t worry—you don’t have to call a repair service or buy a whole new mower. You can replace your mower battery charger yourself, even if you’re not a tech expert. You’ll find simple, step-by-step instructions that will save you time and money.
Keep reading, and you’ll have your mower running smoothly again in no time.
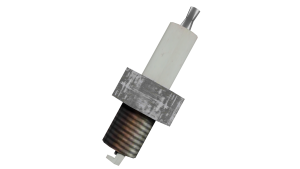
Credit: www.fridayparts.com
Signs Of A Faulty Charger
Recognizing the signs of a faulty mower battery charger can save you time and frustration. Ignoring these warning signals might lead to a dead battery just when you need your mower the most. Pay close attention to how your charger behaves to avoid unexpected breakdowns.
Battery Not Charging
If your battery isn’t charging despite leaving it connected for hours, it’s a clear sign something’s wrong. This might happen even if the charger’s indicator light is on. Check the connection points for corrosion or loose wires, but persistent failure usually means the charger is faulty.
Have you ever left your mower plugged in overnight only to find the battery still dead? That’s a frustrating sign your charger isn’t doing its job.
Overheating Charger
A charger that becomes excessively hot during use is a major red flag. Overheating can damage the battery and the charger itself. If you notice the charger casing is warm or hot to the touch, unplug it immediately to prevent further damage or safety risks.
Heat buildup often means internal components are failing or there’s a short circuit. Don’t ignore this—your safety depends on it.
Unusual Noises
Listen closely when the charger is plugged in. Buzzing, clicking, or humming noises that weren’t there before can indicate electrical problems. These sounds often point to worn-out parts or loose connections inside the charger.
Have you heard odd sounds from your charger? It’s a sign to stop using it and consider replacing it before it causes more trouble.
Choosing The Right Replacement
Choosing the right replacement charger for your mower battery is crucial to keep your equipment running smoothly. Using the wrong charger can damage your battery or reduce its lifespan. Let’s look at key factors to consider so you can make a confident choice.
Matching Voltage And Amperage
Check the voltage and amperage ratings on your original charger before buying a replacement. Your mower’s battery requires a charger that matches these exactly to avoid overcharging or undercharging. For example, if your original charger is 12V and 2A, a charger with the same specs ensures safe and efficient charging.
Using a charger with higher voltage can fry your battery, while lower voltage may not charge it fully. The amperage rating determines how fast the battery charges—higher amperage means faster charging but can stress the battery if it’s too high. Always aim for the same or slightly lower amperage to protect your battery health.
Compatible Connector Types
Not all chargers fit every mower. Your replacement charger must have a connector that matches your mower’s battery port. Connectors come in various shapes and sizes, such as barrel plugs, alligator clips, or specific proprietary connectors.
Imagine ordering a charger only to find the plug doesn’t fit your mower—that’s time and money wasted. Take a close look at your current charger’s plug or your mower’s manual to identify the correct connector type. If you’re unsure, bring your charger or mower to the store for comparison or check product images carefully online.
Brand Vs. Third-party Options
Deciding between an original brand charger and a third-party alternative can be tricky. Brand chargers often guarantee compatibility and reliability but can be pricier. Third-party chargers might save money but vary widely in quality.
Think about how often you use your mower and how critical reliable charging is for you. If your mower is a heavy-duty tool you rely on daily, investing in a brand charger can prevent future headaches. On the other hand, if you use your mower occasionally, a well-reviewed third-party charger might serve you well.
Ask yourself: Would a small saving today be worth the risk of a charger that could damage my battery? Reading customer reviews can reveal real user experiences that help you decide.
Tools Needed For Replacement
Replacing your mower battery charger is straightforward when you have the right tools at hand. The tools you gather can make the process quicker and safer. Without proper equipment, you might struggle or risk damaging parts of your mower or charger.
Basic Hand Tools
Start with a few simple hand tools that you likely already own. A screwdriver setis essential because most chargers are secured with screws. Both flathead and Phillips head screwdrivers will cover most types.
You’ll also need a wrench or socket setto loosen bolts that hold the charger or battery terminals in place. Having a pair of needle-nose plierscan help you reach tight spots and handle small connectors easily.
Don’t forget a multimeterif you want to check the charger’s output voltage before and after replacement. This can save you time troubleshooting later.
Safety Gear
Handling electrical components requires caution. Always wear insulated glovesto protect yourself from electric shocks. Even if the charger is unplugged, residual current can be dangerous.
Protect your eyes with safety goggles. Batteries can sometimes leak acid, and sparks may fly when disconnecting terminals. Keeping your eyes safe should never be overlooked.
Consider having a fire extinguisher rated for electrical firesnearby, just in case something unexpected happens. Safety isn’t just about tools—it’s about being prepared.
Step-by-step Replacement Process
Begin by unplugging the charger and removing it from the mower. Disconnect the old charger carefully, then attach the new one securely. Test the new charger to ensure it works properly before finalizing the setup.
Replacing a mower battery charger might seem daunting, but breaking it down into clear steps makes the task manageable. Whether you’re a seasoned DIY enthusiast or tackling this for the first time, understanding the process will save you time and ensure a smoother experience. Let’s dive into the step-by-step guide to swapping out your old mower battery charger with a new one.Disconnecting The Old Charger
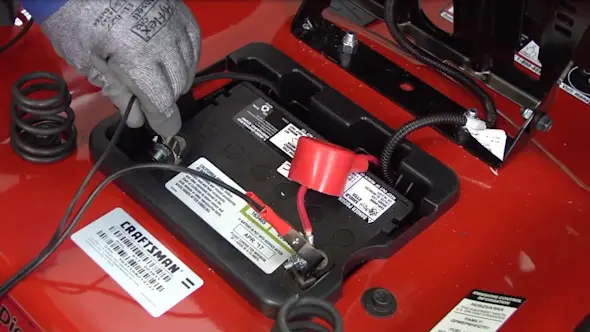
Begin by ensuring your safety. Turn off the mower and remove the key from the ignition. This prevents any accidental start-up while you’re working. Locate the battery charger. It’s usually near the battery compartment. Disconnect the charger from the power source to avoid any electrical hazards. Carefully detach the charger from the battery. Make sure to note which wire connects to which terminal. A quick photo on your phone can help you remember the setup.Removing The Faulty Charger
With the charger disconnected, remove any screws or bolts securing it in place. You might need a screwdriver or a small wrench. Gently lift the charger out of its compartment. Avoid pulling on the wires to prevent damage. Dispose of the faulty charger responsibly. Many local recycling centers accept electronic waste.Installing The New Charger
Unpack your new charger and compare it to the old one. Ensure the connections match up correctly. Place the new charger into the compartment. Secure it with the screws or bolts you removed earlier. Connect the charger wires to the battery terminals. Double-check your earlier photo to ensure the connections are correct.Testing The New Charger
Reconnect the charger to the power source. Turn on the mower to check if the battery is charging. Look for indicator lights on the charger. A green light often signals that charging is in progress. Monitor the charging process for a few minutes. Ensure there are no unusual noises or excessive heat. By following these steps, you can effectively replace your mower battery charger, extending the life of your equipment. Have you ever replaced a charger before? What tips do you have for others?Safety Tips During Replacement
Replacing your mower battery charger involves working with electrical parts and sensitive batteries. Safety must be your top priority to avoid injuries or damaging your equipment. Taking simple precautions can protect you and ensure the replacement goes smoothly.
Handling Electrical Components
Always unplug the charger from the power source before touching any electrical parts. This prevents electric shock and accidental short circuits. Use insulated tools to avoid direct contact with wires or terminals.
Wear rubber gloves to add an extra layer of protection. Check the charger and wires for any visible damage before starting. Damaged cords or connectors can cause sparks or fires, so replace them if needed.
Avoiding Battery Damage
Batteries store energy that can be dangerous if mishandled. Avoid dropping or shaking the battery, as this can cause leaks or internal damage. Keep the battery away from water and extreme temperatures during replacement.
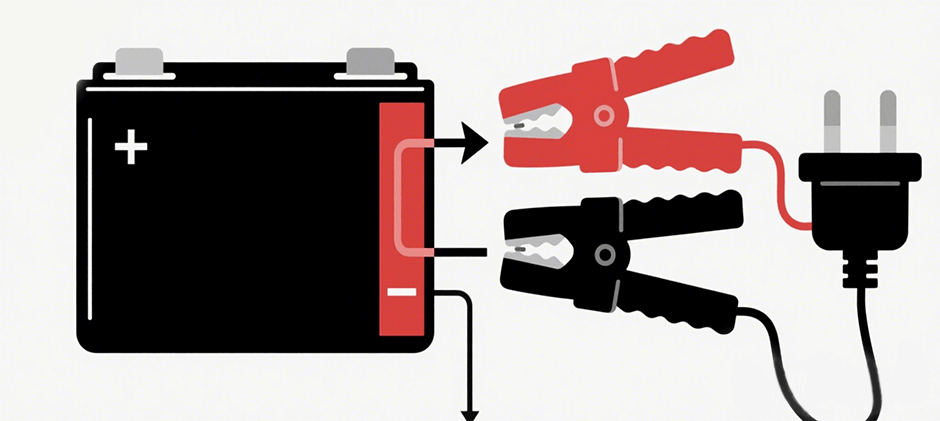
Disconnect the battery terminals in the correct order—negative first, then positive—to prevent short circuits. When connecting the new charger, ensure the polarity matches exactly. Have you ever connected a charger backward? It can ruin your battery instantly.

Credit: www.youtube.com
Maintaining Your Charger And Battery
Keeping your mower battery charger and battery in top shape extends their lifespan and ensures reliable performance every time you mow. Simple habits like cleaning, storing correctly, and inspecting regularly can prevent common issues that lead to charger failure or battery problems. Have you noticed your mower taking longer to start? It might be time to check how well you maintain these key components.
Regular Cleaning
Dirt and debris can build up on your charger and battery terminals, causing poor connections and reducing charging efficiency. Use a soft, dry cloth or a small brush to gently clean the terminals and charger ports. Avoid water or harsh chemicals, as they can damage the electrical parts.
Cleaning after every few uses can make a big difference. Think about how grime affected my own mower—it barely charged until a quick wipe fixed the issue.
Proper Storage
Storing your charger and battery in a cool, dry place prevents moisture damage and keeps them functioning well. Avoid areas with extreme temperatures or high humidity, like garages that get very hot or damp basements.
Unplug your charger when not in use and keep the battery off the mower if you won’t be mowing for weeks. This simple habit helped me avoid a dead battery last winter.
Routine Inspections
Inspect your charger cables and battery terminals regularly for cracks, corrosion, or loose connections. Catching these problems early can save you from unexpected breakdowns.
If you spot any damage, replace the cables or clean the corrosion immediately. Have you checked your charger’s indicator lights lately? They often signal when something isn’t right.

Credit: www.amazon.com
Frequently Asked Questions
How Do I Know When To Replace Mower Battery Charger?
You should replace your mower battery charger if it no longer charges properly, shows visible damage, or causes overheating. Frequent charging failures and longer charging times also indicate the need for replacement.
Can I Use Any Charger For My Mower Battery?
It is best to use the charger designed for your mower battery. Using incompatible chargers can damage the battery and reduce its lifespan. Always check the voltage and connector type before purchasing a replacement.
What Safety Precautions Should I Take When Replacing The Charger?
Always unplug the charger and mower before replacement. Wear protective gloves and avoid water contact during the process. Follow the manufacturer’s instructions carefully to prevent electrical shocks or damage.
How Long Does It Take To Replace A Mower Battery Charger?
Replacing a mower battery charger typically takes 10 to 20 minutes. The process involves disconnecting the old charger and connecting the new one securely. It’s a quick and straightforward task with basic tools.
Conclusion
Replacing your mower battery charger is simple and saves money. Follow each step carefully to avoid mistakes. Check the charger’s compatibility with your mower first. Use the right tools and stay safe during the process. A good charger keeps your mower ready to use anytime.
Regular maintenance helps your mower last longer. Now, you can replace the charger without stress. Keep your mower running smoothly all season long.