Is your mower refusing to start when you need it most? The culprit might be a faulty starter solenoid.
This small but crucial part acts like a switch, sending power from your battery to the engine. When it stops working, your mower won’t turn on, leaving your lawn care plans on hold. But don’t worry—fixing mower starter solenoid problems is easier than you think.
In this guide, you’ll learn simple steps to diagnose and repair the issue quickly. Keep reading to get your mower back up and running without hassle.
Symptoms Of Starter Solenoid Issues
The starter solenoid is a vital part of your mower’s ignition system. When it has problems, the mower may fail to start or show unusual behavior. Recognizing these symptoms early helps you fix the issue before it gets worse. Watch out for signs like no response when turning the key, inconsistent starting, and damaged connections. These clues point to possible solenoid troubles.
No Start Or Click Sound
The mower won’t start, and you hear no clicking noise. This often means the solenoid isn’t engaging to send power to the starter. It could be stuck or completely dead. A silent key turn usually signals a broken solenoid coil or poor electrical contact.
Intermittent Starting Problems
The mower starts sometimes but fails other times. This erratic behavior suggests a loose or worn solenoid. Internal contacts may be corroded or damaged. The solenoid might work only when tapped or jiggled. This makes starting unpredictable and frustrating.
Burnt Or Corroded Connections
Visible damage on wiring or terminals can cause solenoid failure. Look for blackened, melted, or rusted spots on the connections. These reduce electrical flow and cause starting issues. Cleaning or replacing damaged wires often restores proper function.
Tools And Materials Needed
Fixing a mower starter solenoid requires the right tools and materials. Using proper equipment makes the job easier and safer. Gather everything before starting your repair to avoid interruptions.
Basic Hand Tools
- Screwdrivers (flathead and Phillips)
- Wrenches or socket set
- Pliers for gripping wires
- Wire cutters and strippers
- Flashlight for better visibility
Multimeter For Testing
A multimeter checks electrical connections and voltage. It helps find if the solenoid is faulty or if wiring has issues. Choose a digital multimeter for clear readings and ease of use.
Replacement Parts
- New starter solenoid matching your mower model
- Replacement wires or connectors if damaged
- Electrical tape or heat shrink tubing for insulation
Safety Precautions Before Repair
Always disconnect the mower’s battery before starting any repair work. Wear gloves and eye protection to avoid injuries from sparks or sharp parts. Ensure the mower is on a flat surface to prevent accidental movement.
Before tackling any mower starter solenoid issues, prioritize safety. Proper precautions ensure a smooth and safe repair process. This section guides you on essential safety steps.Disconnecting The Battery
Always disconnect the battery before repairs. This prevents accidental electrical shocks. Remove the negative cable first. Then, detach the positive cable. Store them away from the terminals. This step ensures no power flows during your work.Wearing Protective Gear
Wear appropriate protective gear for safety. Use gloves to protect your hands. Safety glasses shield your eyes from debris. Wear durable clothing to cover your skin. These precautions minimize injury risks during the repair.Testing The Starter Solenoid
Testing the starter solenoid is a key step in fixing mower starting issues. It helps find out if the solenoid works properly or needs replacement. A faulty solenoid can stop the mower from starting or cause electrical problems.
Testing requires simple tools like a multimeter and a basic understanding of voltage and continuity. This process ensures you avoid unnecessary part replacements and save time. Follow clear steps to check the solenoid’s electrical function.
Checking For Voltage
First, locate the starter solenoid on your mower. It usually looks like a small metal box near the battery or starter motor. Use a voltmeter or multimeter set to measure DC voltage.
Turn the mower key to the start position. Check the voltage at the solenoid’s battery terminal. It should show the full battery voltage, around 12 volts. Next, check the voltage at the starter terminal on the solenoid. It should only have voltage when you turn the key to start.
If there is no voltage at the solenoid terminals, the problem could be a dead battery, bad wiring, or a faulty ignition switch.
Using A Multimeter To Test Continuity
Set your multimeter to the continuity test mode or the lowest resistance setting. Disconnect the battery before testing to avoid shocks or damage. Remove wires connected to the solenoid terminals carefully.
Place the multimeter probes on the solenoid’s input and output terminals. The meter should show no continuity when the solenoid is off. When you press the solenoid plunger or energize it with a small jumper wire, the meter should show continuity.
No continuity means the solenoid contacts are bad or burnt. Continuity when off means the solenoid is stuck closed. Both conditions require solenoid replacement.
Cleaning Corroded Connections
Cleaning corroded connections is key to fixing mower starter solenoid problems. Corrosion blocks electric flow, stopping the mower from starting. Cleaning these parts restores power and improves mower performance.
Removing Rust And Debris
First, disconnect the battery to avoid shocks. Use a wire brush or sandpaper to scrub rust and dirt off the connections. Clean both the solenoid terminals and the connecting wires. Make sure to remove all loose debris for a clear, solid contact.
After scrubbing, wipe the area with a clean cloth. Check if the metal looks shiny and smooth. If corrosion remains, repeat the cleaning until the surface is clean.
Applying Protective Grease
Once cleaned, apply a thin layer of dielectric grease on the connections. This grease stops moisture and air from causing new rust. It helps keep the connection strong and reliable.
Use a small brush or your finger to spread the grease evenly. Avoid applying too much, as excess can attract dirt. Regularly check and reapply grease to maintain protection.

Credit: www.searshomeservices.com
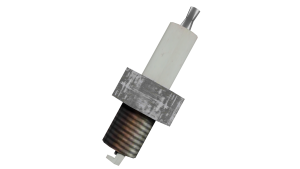
Replacing The Starter Solenoid
Replacing the starter solenoid is often the key to solving mower starting issues. It’s a straightforward fix that you can do yourself with a few tools and some patience. Before you start, make sure your mower is off and the key is removed to avoid any accidents.
Removing The Old Solenoid
Begin by locating the starter solenoid, usually near the battery or engine. It looks like a small metal cylinder with wires attached.
Use a wrench or socket set to loosen the nuts holding the solenoid in place. Keep track of any washers or small parts as you remove them. Carefully disconnect the wires, noting where each one was connected—taking a photo can help.
Installing The New Solenoid
Place the new solenoid where the old one was mounted. Align it properly so that the mounting holes match up.
Secure the solenoid with the nuts and washers you saved earlier. Make sure it’s tight but avoid over-tightening, which can damage the threads.
Reconnecting The Wiring
Reconnect each wire to its correct terminal on the new solenoid. Use your photo or notes to ensure accuracy.
Check that all connections are snug and secure to prevent any electrical issues. Loose connections can cause the starter to fail or work intermittently.
After everything is connected, try starting your mower. Does it crank smoothly now? If not, double-check your wiring and mounting for any missed steps.
Preventive Maintenance Tips
Preventive maintenance is the key to avoiding unexpected mower starter solenoid problems. Taking a little time regularly to check and care for your mower can save you from costly repairs and frustrating downtime. Let’s look at simple, practical steps you can take to keep your mower’s starter solenoid in top shape.
Regular Inspection Schedule
Set a specific routine to inspect your mower’s starter solenoid. Look for signs of wear, corrosion, or loose connections every few weeks, especially during mowing season.
Use a flashlight to spot any dirt buildup or damaged wiring around the solenoid. Clean off any debris and tighten loose terminals immediately. This simple habit can prevent many common failures before they happen.
Ask yourself: How often do you check your mower’s electrical parts? Making inspections a habit can catch small issues early and keep your mower ready to start without trouble.
Keeping Electrical Components Dry
Moisture is a silent enemy of your mower’s electrical system. Water can cause corrosion or short circuits in the starter solenoid, leading to failure.
Store your mower in a dry place, preferably under cover or inside a garage. If you must leave it outside, use a waterproof cover that fits snugly to keep rain and dew off.
After using your mower on wet grass or in damp conditions, wipe down the starter solenoid and nearby wiring. This quick step reduces the risk of moisture damage and prolongs the life of your starter system.

Credit: www.searshomeservices.com

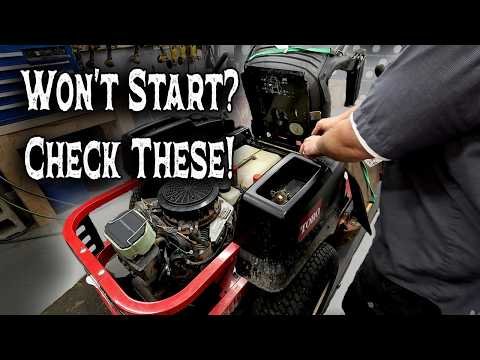
Credit: www.youtube.com
Frequently Asked Questions
What Causes Mower Starter Solenoid Failure?
Mower starter solenoids fail due to wear, corrosion, or electrical issues. Dirt and moisture can cause corrosion. Faulty wiring or a dead battery also affect solenoid function. Regular maintenance helps prevent these problems.
How Do I Test A Mower Starter Solenoid?
Use a multimeter to check for continuity and voltage. Test the solenoid terminals while pressing the start switch. If no voltage or continuity is detected, the solenoid may be faulty and need replacement.
Can A Bad Solenoid Prevent Mower From Starting?
Yes, a bad solenoid can stop the mower from starting. It acts as a switch to send power to the starter motor. If it fails, the starter motor won’t engage, preventing the engine from cranking.
How To Safely Replace A Mower Starter Solenoid?
Disconnect the battery before starting. Remove the old solenoid by unscrewing mounting bolts and disconnecting wires. Install the new solenoid by reconnecting wires and bolts securely. Reconnect the battery and test the mower.
Conclusion
Fixing a mower starter solenoid is easier than it seems. Check connections and test the solenoid carefully. Replace parts that show wear or damage. Regular maintenance helps prevent future problems. Your mower will start smoothly again. Keep tools handy and follow safety steps.
Enjoy a well-running mower all season long. Simple steps save time and money. No need to call a repair expert often. Stay confident and keep your mower ready.