Is your mower’s primer bulb not working, leaving you stuck and frustrated? You’re not alone.
When that little bulb fails, it can stop your mower from starting, making your yard work much harder than it needs to be. But don’t worry—fixing it is easier than you might think. You’ll discover simple, step-by-step solutions to get your primer bulb back in action fast.
Keep reading, and you’ll have your mower running smoothly again before you know it.
Signs Of A Faulty Primer Bulb
Recognizing the signs of a faulty primer bulb can save you time and frustration. When your mower struggles to start or behaves oddly, the primer bulb is often the culprit. Knowing what to look for helps you decide if the bulb needs fixing or replacing before the problem worsens.
Difficulty Starting The Mower
If you find yourself pressing the primer bulb multiple times without success, your mower might be sending a clear signal. A faulty primer bulb fails to push enough fuel into the carburetor, making the engine hard to start or causing it to stall soon after starting.
Think about the last time your mower took longer than usual to roar to life. Did you notice repeated attempts at priming? That’s a strong hint your primer bulb isn’t working properly.
Fuel Leakage Around Bulb
Spotting fuel pooling or dripping near the primer bulb is a red flag. Cracks or holes in the bulb allow fuel to leak out instead of reaching the engine, which can be dangerous and wasteful.
Have you ever smelled fuel near your mower even after refueling? Check the primer bulb area closely—it could be the source. Catching leaks early prevents bigger damage and keeps your mower safe to use.
Bulb Does Not Inflate
A healthy primer bulb should puff up when pressed, creating suction to draw fuel. If yours feels flat, soft, or doesn’t inflate at all, it’s likely worn out or cracked inside.
Try pressing the bulb a few times and watch for any resistance or springiness. No bounce back means the bulb can’t do its job, and replacing it will get your mower primed and running smoothly again.

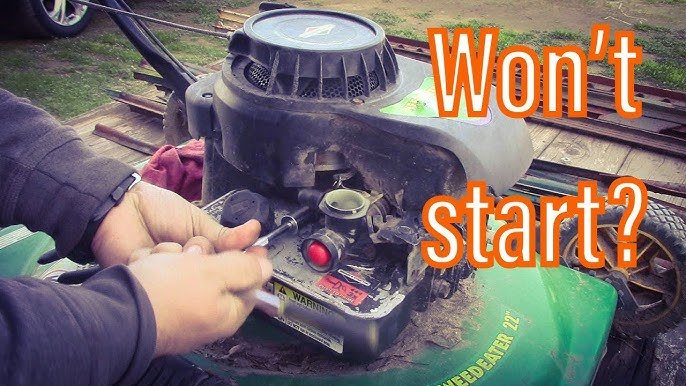
Credit: www.youtube.com
Common Causes Of Primer Bulb Issues
The primer bulb is essential for starting your mower. It pushes fuel into the carburetor to help ignite the engine. Problems with the primer bulb stop the mower from starting or cause it to stall. Understanding common causes of primer bulb issues helps fix the problem fast.
Cracks And Damage
Primer bulbs are made of soft rubber. Over time, they can develop cracks or holes. Damage lets air leak, so the bulb cannot build pressure. A cracked bulb will feel loose or soft. Replace it quickly to avoid fuel flow problems.
Clogged Fuel Lines
Dirt or debris can block fuel lines connected to the primer bulb. Blockages stop fuel from reaching the carburetor. Check the lines for dirt, old fuel, or sticky residue. Clean or replace clogged lines to restore fuel flow.
Worn Out Check Valves
Check valves inside the primer bulb control fuel direction. Worn or broken valves let fuel flow back, not forward. This causes the primer bulb to lose suction. Inspect valves for wear and replace the primer bulb if needed.
Tools And Materials Needed
Before you dive into fixing your mower’s primer bulb, it’s important to gather the right tools and materials. Having everything ready saves time and prevents frustration. Plus, using the proper tools helps you avoid damaging delicate parts.
Replacement Primer Bulb
The primer bulb is the key part you’ll likely need to replace if it’s not working. Make sure to get a bulb that matches your mower’s model exactly. Using the wrong size or type can cause more problems and won’t fit properly.
Keep the old bulb nearby for comparison when shopping or ordering online. This simple step can prevent you from buying the wrong replacement and wasting money.
Screwdrivers And Pliers
You’ll need basic screwdrivers, usually both flathead and Phillips, to open up the mower’s primer bulb housing. Pliers come in handy for removing clips or pulling out stubborn parts carefully.
Choose screwdrivers with comfortable grips to avoid slipping. If you’ve ever struggled with a stripped screw, you know how frustrating it can be. Having the right size tool makes the job smoother.
Cleaning Supplies
Often, a dirty or clogged primer bulb area causes it to stop working properly. You’ll want some cleaning supplies like a soft brush, cloth, and maybe some mild detergent or carburetor cleaner.
Take care not to use harsh chemicals that could damage rubber or plastic parts. A clean workspace and gentle cleaning can sometimes bring a bulb back to life without replacement.
Step-by-step Repair Process
Begin by locating the primer bulb and removing it carefully. Check for cracks or dirt blocking fuel flow. Replace or clean the bulb, then test your mower to ensure it starts smoothly.
Repairing a non-working mower primer bulb can seem daunting at first, but breaking it down into a step-by-step process makes it manageable. Imagine that moment when you effortlessly start your mower, knowing you fixed the issue yourself. Let’s dive into the repair process and get your mower back in action.Removing The Old Primer Bulb
To start, ensure your mower is turned off and cool to touch. Safety first—disconnect the spark plug to avoid any accidental starts. Next, locate the primer bulb. It’s usually near the carburetor. Use a screwdriver to carefully pry out the old bulb. It might be brittle, so handle it gently. If you’ve ever felt the satisfaction of solving a puzzle, removing the bulb is just as rewarding.Inspecting Fuel Lines And Valves
Once the primer bulb is out, it’s time to inspect the surrounding components. Check the fuel lines for any cracks or leaks. A damaged line can hinder the primer bulb’s function. Examine the valves as well. Ensure they are clear of debris and functioning smoothly. It’s like a quick health check-up for your mower, ensuring everything is in working order.Installing The New Primer Bulb
With the area prepped, it’s time to install the new primer bulb. Align it properly with the housing and press firmly until it snaps into place. It’s a moment that feels like completing a DIY project, bringing a sense of accomplishment. Reconnect the fuel lines and ensure they are tightly secured. Reattach the spark plug, and your mower is ready for a test run. Feel the thrill as you press the bulb, hearing the fuel flow, a sign of a job well done. Have you ever fixed something and felt like a pro? That’s the feeling you get when you see your mower roar back to life.Cleaning And Maintenance Tips
Cleaning and maintaining your mower’s primer bulb can keep it working smoothly. Dirt, old fuel, and debris often cause problems. Simple care can extend the life of your mower and prevent costly repairs.
Clearing Fuel Line Blockages
Blockages in the fuel line stop fuel from reaching the primer bulb. Remove the fuel line carefully. Use compressed air or a thin wire to clear any dirt or debris inside. Check for cracks or damage in the fuel line. Replace the line if you find any holes or wear. Clean the fuel filter as well to improve flow.
Preventing Future Damage
Use fresh fuel to avoid clogging the primer bulb. Old fuel can gum up the system. Store your mower in a dry place to stop moisture buildup. Avoid rough handling of the primer bulb to prevent cracks. Use fuel stabilizer if you store the mower for a long time. This keeps the fuel clean and prevents buildup.
Regular Inspection Schedule
Check the primer bulb every few weeks during mowing season. Look for signs of cracks, hardness, or leaks. Inspect fuel lines and connections for wear or damage. Clean the area around the primer bulb to avoid dirt entry. A simple routine saves time and keeps your mower ready to use.

Credit: www.diychatroom.com
When To Seek Professional Help
Knowing when to seek professional help saves time and avoids extra damage. Some mower problems need expert tools and skills. Trying to fix complex issues without experience may worsen the problem.
Simple fixes like cleaning or replacing the primer bulb are easy to do. But persistent or complicated troubles signal the need for a technician. Professionals can quickly diagnose and repair the mower safely.
Persistent Starting Problems
When your mower refuses to start despite checking the primer bulb, it is a red flag. Repeated attempts and basic fixes fail. This often points to deeper engine or ignition issues.
Experts can test the spark plug, carburetor, and fuel delivery system. They have the right tools to pinpoint the cause. Avoid wasting time on trial and error.
Complex Fuel System Issues
Fuel system problems can be tricky. Blocked fuel lines, dirty carburetors, or faulty fuel pumps require detailed inspection. The primer bulb may seem faulty but the root cause lies elsewhere.
Professional mechanics clean and repair fuel system parts safely. They prevent fuel leaks and damage to sensitive components. Let trained hands handle these complex repairs.

Credit: www.reddit.com
Frequently Asked Questions
Why Is My Mower Primer Bulb Not Working?
A faulty primer bulb often cracks, leaks, or clogs. Check for visible damage or dirt blocking fuel flow. Replacing a damaged bulb usually solves the issue.
How Do I Replace A Mower Primer Bulb?
Remove the old bulb by detaching it from fuel lines. Install a new bulb by securing it tightly to ensure fuel flows properly.
Can A Clogged Carburetor Cause Primer Bulb Issues?
Yes, a clogged carburetor can prevent fuel from reaching the primer bulb. Cleaning the carburetor often restores proper fuel flow and bulb function.
What Tools Do I Need To Fix A Primer Bulb?
Basic tools include screwdrivers, pliers, and replacement primer bulbs. These help remove the old bulb and install the new one easily.
Conclusion
Fixing a mower primer bulb can save time and money. Check the bulb for cracks or damage first. Clean the carburetor and fuel lines to ensure smooth fuel flow. Replace the bulb if it looks worn out or cracked. Test the mower after each step to see if it starts properly.
Taking these steps keeps your mower running well. A working primer bulb helps your mower start quickly. Keep these tips handy for future mower problems. Simple care prevents bigger issues later on.