If you want your mower to run smoothly next season, cleaning the carburetor before storage is a must. Ignoring this simple step can lead to clogged parts and frustrating startup problems later.
In this guide, you’ll learn exactly how to clean your mower’s carburetor quickly and effectively. With easy instructions you can follow today, you’ll protect your investment and save time when it’s time to mow again. Keep reading to make sure your mower stays in top shape all year round.
Prepare Your Workspace
Preparing your workspace is essential before you start cleaning your mower carburetor for storage. A tidy, well-organized area helps you focus and avoid losing small parts during the process. It also reduces the risk of accidents and makes the cleaning task smoother and faster.
Gather Necessary Tools
Collect all the tools you will need before starting. This usually includes a screwdriver set, a small brush, carburetor cleaner spray, clean rags, and a container for soaking parts. Having everything within reach prevents interruptions and keeps your workflow steady.
Think about your past experiences—did you ever stop mid-cleaning to search for a tool? Avoid that by setting up everything in one spot. Also, consider using a magnetic tray to hold screws and tiny components safely.
Ensure Safety Measures
Safety should always come first. Work in a well-ventilated area since carburetor cleaners release fumes that can be harmful if inhaled in large amounts. Wearing gloves and safety glasses protects your skin and eyes from chemicals and debris.
Do you know where your nearest first aid kit is? It’s wise to have it close by. Also, keep a fire extinguisher nearby because some cleaning sprays are flammable. Taking these precautions helps you stay safe and confident throughout the cleaning process.
Remove The Carburetor
Removing the carburetor is a key step before cleaning it for storage. This process helps avoid damage and makes cleaning easier. Handle the carburetor carefully to keep all parts intact.
Disconnect Fuel Lines
Start by turning off the fuel valve or removing the fuel cap. This prevents fuel from spilling. Use pliers to gently squeeze the clamps on the fuel lines. Slowly pull the fuel lines away from the carburetor. Place a container or cloth nearby to catch any drips. Label the lines if needed, so you can reconnect them correctly later.
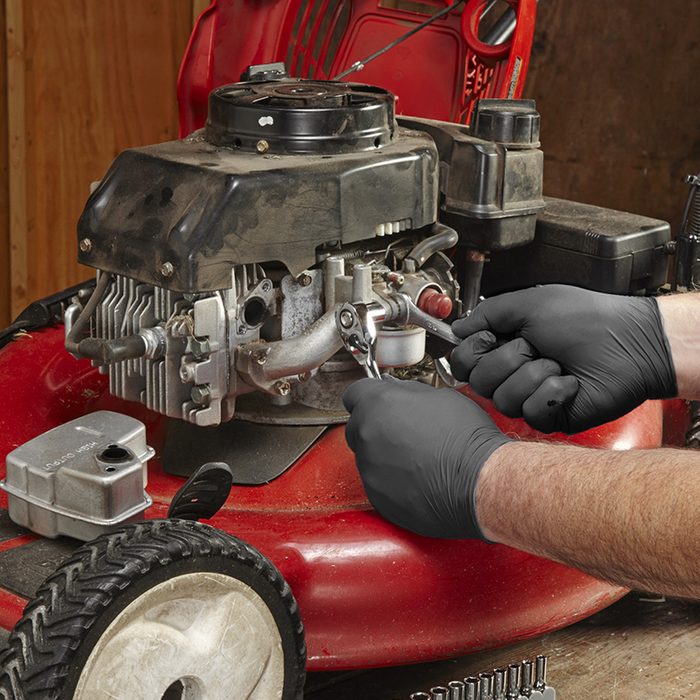
Detach Carburetor From Mower
Locate the bolts or screws holding the carburetor in place. Use the right size wrench or screwdriver to loosen them. Keep these fasteners safe for reassembly. Carefully pull the carburetor away from the engine block. Watch for gaskets or seals that may come loose. Set the carburetor on a clean surface for cleaning.
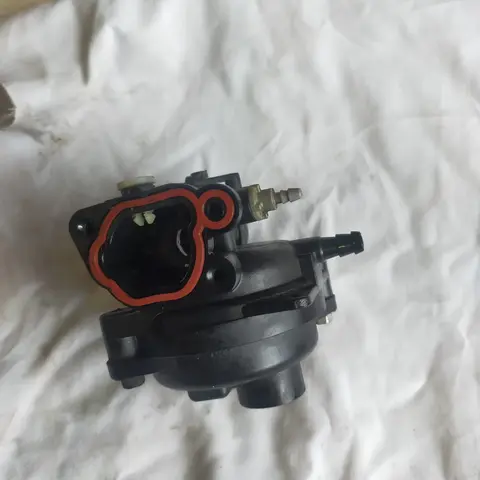
Disassemble The Carburetor
Disassembling the carburetor is essential for proper cleaning before storage. It allows access to parts that hold fuel residue and dirt. Careful disassembly ensures thorough cleaning and prevents damage. Take your time and keep track of small parts for easy reassembly.
Remove Float Bowl And Jets
Start by removing the float bowl carefully. Use a wrench or screwdriver depending on your mower model. Place all screws and parts in a small container to avoid losing them. Next, remove the jets from the carburetor body. Jets can be clogged with dirt or old fuel. Clean these parts separately using carburetor cleaner and a soft brush.
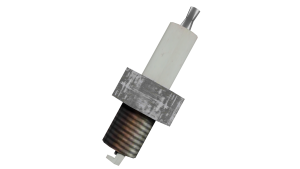
Inspect Parts For Damage
Check all parts for cracks, wear, or corrosion. Look closely at the float, needle valve, and jets. Replace any parts that show damage to avoid future problems. Clean parts that appear in good condition thoroughly. Proper inspection helps keep your mower running smoothly after storage.
Clean Carburetor Components
Remove dirt and old fuel from the carburetor parts to keep your mower running well. Clean each component carefully to prevent clogs and damage during storage. Dry all parts thoroughly before reassembling for long-lasting performance.
Cleaning the components of your mower’s carburetor is essential to ensure it performs efficiently and is ready for action when you need it. It’s not just about storing your equipment properly—it’s about keeping it in peak condition, so you can avoid any unpleasant surprises next mowing season. A clean carburetor keeps your mower running smoothly and helps prevent costly repairs.Use Carburetor Cleaner Spray
Start by using a carburetor cleaner spray. This is a powerful tool that dissolves gum and varnish that accumulate in the carburetor over time. Spray it generously on all visible components, focusing on areas where buildup is visible. Ensure the spray reaches crevices and corners you might miss with a simple wipe. It’s like giving your carburetor a fresh start, ready to tackle the next mowing season.Clear Clogged Passages
Clogged passages can severely affect your mower’s performance. Use a thin wire or a special carburetor cleaning tool to gently clear any blockages. This step is crucial because even a small obstruction can lead to a rough-running engine or failure to start. Are you noticing a sluggish start or reduced power? This could be your clue to clean those passages thoroughly.Clean Jets And Float Bowl
The jets and float bowl are key components that require attention. Remove the float bowl by unscrewing it, taking care not to lose the small parts. Clean the jets using the carburetor cleaner spray and ensure there’s no residue or blockage. This practice ensures your mower has the right fuel-air mixture for optimal performance. Remember the time your mower just wouldn’t start, and you had no idea why? Often, it’s these small components that get overlooked. Paying attention to them can save you from frustration and wasted time. By maintaining these components, you’re not just storing your mower; you’re setting yourself up for success when it’s time to mow again. Who wouldn’t want a smooth start and efficient performance from their mower?Dry And Reassemble
After thoroughly cleaning your mower carburetor, the next crucial phase is drying and reassembling the parts. This step ensures that no moisture remains to cause rust or damage during storage. Taking your time here can save you from frustrating issues next season.
Air Dry Components
Lay out all the cleaned carburetor parts on a clean, dry cloth or paper towel. Let them air dry naturally—avoid using compressed air or heat sources as they can warp delicate components.
Patience is key. Even if parts look dry, moisture can linger in tiny crevices. Have you ever started your mower after storage only to find it sputtering? Moisture trapped inside could be the culprit.
Leaving the parts to air dry for several hours or overnight is best. If you’re in a hurry, make sure they feel completely dry to the touch before moving on.
Reinstall Parts Correctly
Reassembling the carburetor demands attention to detail. Keep your workspace organized so you don’t lose small screws or springs. It helps to take photos during disassembly for reference.
Fit each part back in its original place carefully. Loose or misaligned parts can cause leaks or poor engine performance. Double-check that gaskets are seated properly to avoid air leaks.
Have you noticed how a tiny misplacement can make your mower hard to start? Taking a few extra minutes to reinstall parts correctly prevents hours of troubleshooting later on.
Credit: midlandslawnmowerrepairs.co.uk
Reinstall Carburetor On Mower
Reinstalling the carburetor on your mower is a crucial step after cleaning it for storage. Proper reinstallation ensures your mower will start easily and run smoothly next season. Taking your time here prevents fuel leaks and engine problems later on.
Reconnect Fuel Lines
Start by carefully reconnecting the fuel lines to the carburetor. Make sure each line goes back to its original position to avoid mixing fuel and air flow. If the connections feel loose, you might need to replace old clamps or tighten them to prevent leaks.
Double-check for cracks or damage on the fuel lines before attaching. A small crack can cause fuel to drip, which is dangerous and reduces mower efficiency. Have you ever thought how a tiny leak might lead to bigger engine troubles?
Secure Carburetor In Place
Once the fuel lines are reconnected, align the carburetor with its mounting points on the mower. Use the bolts or screws you removed earlier to firmly secure it. Avoid overtightening, which can damage the carburetor body or the mounting threads.
After securing, gently wiggle the carburetor to confirm it’s stable. A loose carburetor can cause vibrations and poor engine performance. Remember, a steady carburetor means a steady mower engine ready for action.
Final Checks Before Storage
Before putting your mower away for the season, performing final checks is essential. These steps ensure the carburetor and mower stay in good shape. Proper preparation reduces problems next spring.
Check the mower’s performance after cleaning the carburetor. This confirms everything works smoothly. Also, remove any leftover fuel to prevent damage and clogs.
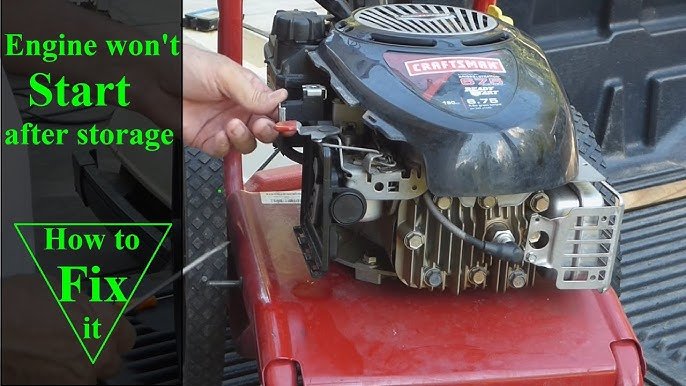
Test Mower Operation
Start the mower and let it run for a few minutes. Listen for smooth running without sputtering or stalling. Check if the throttle responds well to control. A well-running engine means the carburetor is clean and clear. Fix any issues before storage to avoid bigger problems later.
Drain Remaining Fuel
Empty the gas tank completely to stop fuel from going bad. Old fuel can gum up the carburetor and fuel lines. Use a fuel siphon or run the mower until it stops. Store fuel in a sealed container for future use. This step protects the carburetor and helps the mower start easily next time.

Credit: www.eufy.com
Credit: www.familyhandyman.com
Frequently Asked Questions
How Often Should I Clean My Mower Carburetor Before Storage?
Clean your mower carburetor after every mowing season or long storage. This prevents fuel buildup and ensures smooth engine start next season.
What Tools Do I Need To Clean A Mower Carburetor?
You need screwdrivers, carburetor cleaner spray, a small brush, and compressed air. These help remove dirt and debris effectively.
Can I Use Household Cleaners To Clean A Carburetor?
No, avoid household cleaners. Use a proper carburetor cleaner spray designed to dissolve fuel deposits safely without damaging parts.
How Long Does It Take To Clean A Mower Carburetor Properly?
Cleaning typically takes 20 to 30 minutes, depending on your experience. Thorough cleaning ensures better mower performance and longer carburetor life.
Conclusion
Cleaning your mower carburetor before storage keeps it working well. Dirt and old fuel can cause problems later. A clean carburetor helps the mower start easily next season. Take your time and follow each step carefully. Regular cleaning saves money on repairs.
Store your mower in a dry place after cleaning. Ready for next use, your mower will perform better. Simple care now avoids big troubles later. Keep your mower happy and healthy through the winter.