Is your mower battery dead, leaving you stuck when you need to get the job done? Don’t worry—you can bring it back to life quickly using just jumper cables.
Knowing how to charge your mower battery with jumper cables can save you time, money, and frustration. In this guide, you’ll learn simple, step-by-step instructions that anyone can follow. By the end, you’ll feel confident handling your mower battery and be ready to get back to work without delay.
Keep reading to discover how easy it really is!
Preparing For Charging
Preparing your mower battery for charging with jumper cables is a key step that sets the stage for a safe and effective process. Taking a moment to gather the right tools and follow safety measures can save you time and prevent accidents. Have you ever rushed into a task only to realize you missed something essential? This is why preparation matters.
Gathering Necessary Tools
Before you start, make sure you have all the tools ready. You’ll need a pair of jumper cables, a working vehicle or a portable battery charger, and protective gloves. Having a flashlight nearby can help if you’re working in low light conditions.
Check your mower’s manual to confirm the battery type and voltage. This ensures compatibility and avoids damage. You might also want to have a wrench handy to disconnect the battery terminals if needed.
Safety Precautions
Safety cannot be overstated when working with batteries and jumper cables. Always wear gloves and eye protection to guard against acid splashes and sparks. Make sure both vehicles or power sources are turned off before connecting cables.
Avoid smoking or open flames near the battery since it can emit flammable gases. Connect the cables in the correct order—positive to positive first, then negative to a grounded metal part—to reduce the risk of short circuits. Have you ever paused to double-check your connections? That moment of caution can prevent costly mistakes.

Credit: www.searspartsdirect.com
Locating The Battery
Finding the mower battery is the first step to charging it with jumper cables. The battery is usually hidden to protect it from dirt and damage. Knowing its exact place helps you avoid mistakes and speeds up the charging process.
Accessing The Mower Battery
Most mower batteries sit under a seat or hood. Remove any covers or panels carefully. Use simple tools if needed, like a screwdriver. Keep track of screws and parts for reassembly. Make sure the mower is off before opening any part. This prevents accidents and sparks.
Identifying Battery Terminals
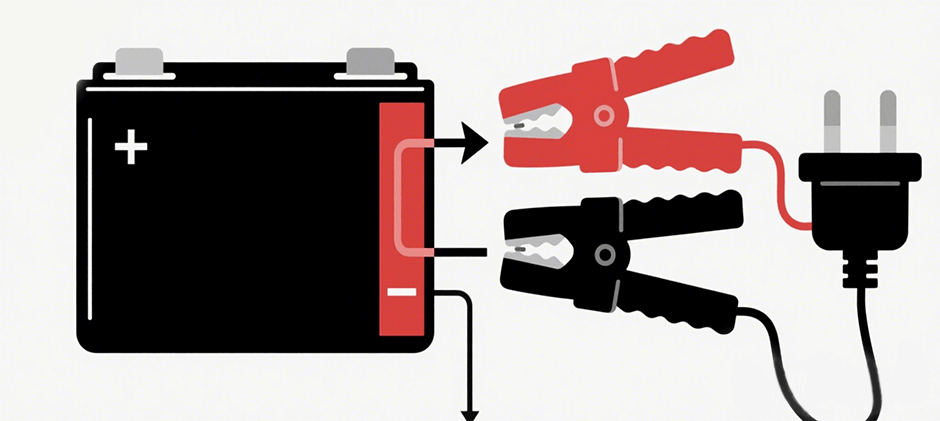
The battery has two terminals: positive and negative. The positive terminal often has a red cover or a plus (+) sign. The negative terminal usually has a black cover or a minus (–) sign. Clean terminals ensure a good connection. Check for corrosion or dirt and wipe it off gently. Correctly identifying terminals is key for safe charging.
Connecting Jumper Cables
Connecting jumper cables correctly is key to safely charging your mower battery. It ensures a steady flow of power without risking damage to your equipment or yourself. Taking a moment to understand the right connection points and sequence can save you from common pitfalls and frustration.
Attaching Cables To Mower Battery
Start by identifying the positive (+) and negative (-) terminals on your mower battery. The positive terminal usually has a red cover or marking, while the negative is often black. Always attach the red jumper cable clamp to the positive terminal first.
Next, connect the black jumper cable clamp to the negative terminal on the mower battery. Make sure the clamps grip the metal parts securely without slipping off. Loose connections can cause sparks or prevent charging altogether.
Connecting To Vehicle Battery
Once the mower battery clamps are secure, move to the vehicle battery. Attach the red jumper cable clamp to the positive terminal of the vehicle battery. This terminal is typically marked with a plus sign or red plastic cover.
Instead of connecting the black clamp directly to the vehicle’s negative terminal, find an unpainted metal surface on the engine block or frame. This grounding point helps reduce the risk of sparks near the battery. Double-check all connections for a snug fit before starting the vehicle to charge your mower battery.
Charging Process
Connect jumper cables from a charged battery to the mower battery terminals. Allow the mower battery to charge for several minutes before disconnecting the cables safely. This process helps restore power and get your mower running again.
The charging process for your mower battery using jumper cables is a straightforward task that can save you time and effort, especially when your mower refuses to start. Whether you’re preparing for the first mow of the season or finishing the last cut of the year, ensuring your battery is charged and ready to go is crucial. Let’s dive into the step-by-step process to get your mower back in action without any hassle.Starting The Vehicle
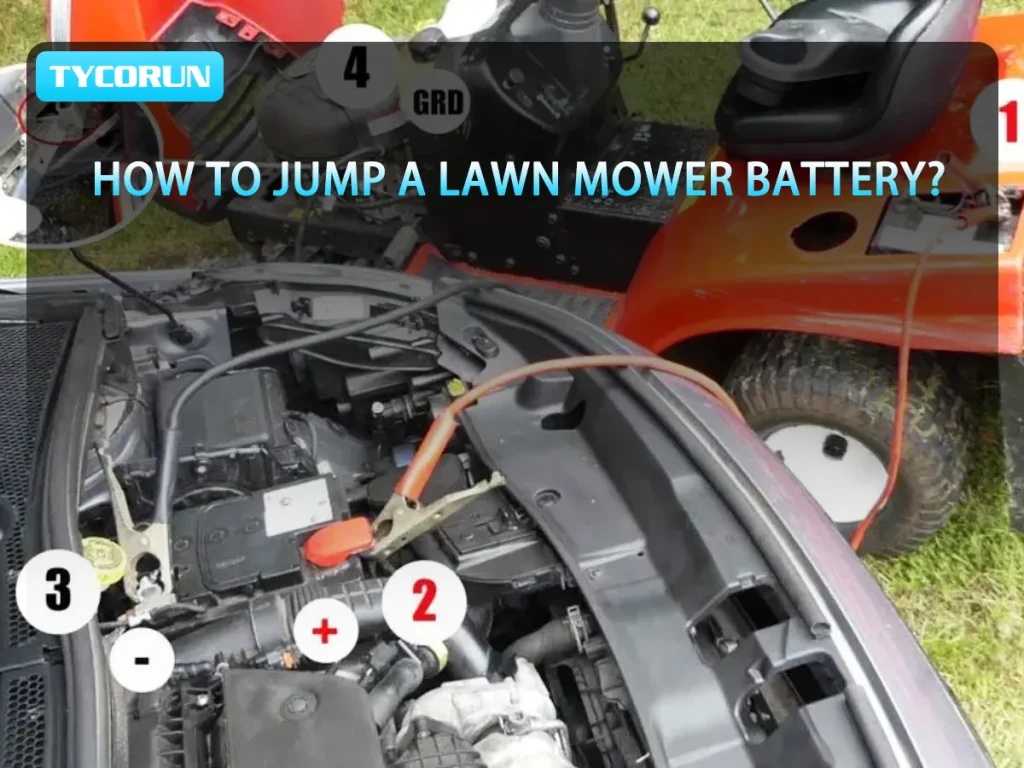
First, position your vehicle close enough to the mower so the jumper cables can reach both batteries comfortably. Ensure both vehicles are turned off before attaching any cables. Open the hoods and locate the batteries in both the vehicle and the mower. Attach the red jumper cable clamp to the positive terminal of the vehicle battery, and then to the mower battery’s positive terminal. Follow this by attaching the black jumper cable clamp to the vehicle’s negative terminal, and finally, find a grounded metal part on the mower to attach the other end of the black cable. Once securely attached, start the vehicle and let it run for a few minutes. This will help charge the mower’s battery through the vehicle’s alternator.Charging Duration And Monitoring
After starting the vehicle, allow the batteries to be connected for about five to ten minutes. This duration typically provides enough charge for the mower to start. However, it’s important to monitor the cables and batteries closely during this time. Ensure the cables are securely attached and not overheating. You might wonder if you should keep the vehicle running longer. It’s a good idea to periodically check if the mower can start after the initial five minutes. If not, let the vehicle run a bit longer. Remember, overcharging can damage your mower’s battery, so keep an eye on it. Once your mower starts successfully, carefully remove the jumper cables in reverse order, starting with the black clamp from the mower, then the black clamp from the vehicle, followed by the red clamp from the mower, and finally the red clamp from the vehicle. By following these steps, your mower should be ready to tackle your lawn with ease. Have you ever tried this method before, and how did it work for you?Disconnecting Jumper Cables
Disconnecting jumper cables after charging your mower battery is a critical step that demands care and attention. Removing them improperly can cause sparks or even damage to your battery or electrical system. Taking your time here ensures safety and preserves your equipment’s health.
Safe Removal Sequence
Start by removing the jumper cable connected to the negative (-) terminal on your mower battery. This reduces the risk of sparks near the battery, which can be dangerous due to flammable gases.
Next, detach the negative cable from the assisting vehicle’s battery. Only then should you remove the positive (+) cable from the assisting battery, followed by the positive cable from your mower’s battery.
Always keep the cable clamps from touching each other or metal surfaces during removal. This simple habit prevents accidental short circuits. Have you ever noticed how a small spark can startle you? That’s why this order matters.
Final Battery Check
Once the cables are safely disconnected, inspect your mower battery terminals. Look for any corrosion, loose connections, or damage that might have caused the initial battery problem.
If the terminals are dirty, clean them with a mixture of baking soda and water before reconnecting. Tighten any loose clamps to ensure a solid connection when you start your mower again.
Consider testing the battery voltage with a multimeter to confirm it holds a sufficient charge. Are you ready to fire up your mower and get back to work? A quick check now saves you from unexpected stalls later.

Credit: www.tycorunenergy.com
Troubleshooting Tips
Charging your mower battery with jumper cables is straightforward, but sometimes issues arise that can leave you scratching your head. Troubleshooting helps you identify what’s wrong and fix it quickly without unnecessary frustration. Let’s look at some common problems and when it’s best to bring in a professional.
Common Issues
One frequent issue is poor cable connection. Loose or corroded clamps can block the flow of electricity. Make sure the clamps are clean and tightly attached to the battery terminals.
If your battery doesn’t hold a charge after jumping, it might be deeply discharged or faulty. Sometimes, the battery is beyond simple charging and needs replacement.
Another problem could be a dead or damaged donor battery. Double-check that the vehicle or battery you’re using to jump-start has enough power to give.
Have you noticed sparks or smoke during the process? This signals a serious problem, such as reversed polarity or a short circuit. Stop immediately and reassess your setup.
When To Seek Professional Help
If you’ve tried all the basic troubleshooting and your mower battery still won’t charge, it’s time to ask for help. Professionals have tools to test battery health and electrical systems accurately.
Electrical issues inside your mower, like a faulty alternator or wiring problems, require expert attention. Attempting repairs without knowledge can cause more damage or injury.
Also, if you feel unsure about handling jumper cables safely, don’t hesitate to call a technician. Your safety is more important than saving a few dollars on a DIY fix.
Credit: www.fridayparts.com
Frequently Asked Questions
How Do I Charge A Mower Battery With Jumper Cables?
To charge a mower battery, connect jumper cables from a car battery. Attach red to positive terminals and black to negative. Start the car for a few minutes to transfer power. Ensure secure connections and avoid sparks for safety.
Can I Use Car Jumper Cables For Mower Batteries?
Yes, car jumper cables work for mower batteries. Both use 12-volt systems. Use caution to match positive and negative terminals correctly. This method provides a quick charge if the mower battery is dead or weak.
How Long Should I Charge A Mower Battery With Jumper Cables?
Charge the mower battery for about 5 to 10 minutes using jumper cables. This timeframe provides enough power to start the mower. Avoid overcharging to prevent battery damage. Disconnect cables carefully after charging.
Is It Safe To Charge A Mower Battery With Jumper Cables?
Charging a mower battery with jumper cables is safe if done correctly. Connect cables properly and avoid sparks. Work in a well-ventilated area and wear safety gear. Follow manufacturer guidelines to prevent accidents.
Conclusion
Charging your mower battery with jumper cables is simple and quick. Always connect cables safely to avoid sparks or shocks. Keep the engine running while charging to help the battery regain power. Regular battery care can prevent future problems. Now, your mower should start easily and run well.
Follow these steps next time your battery dies. Ready to get back to mowing?