Are you ready to give your John Deere riding mower the care it deserves? Changing the oil is a simple yet crucial task that keeps your mower running smoothly and efficiently.
Imagine the satisfaction of knowing you’ve extended the life of your machine with just a few basic steps. Whether you’re a seasoned DIY enthusiast or a first-time mower owner, you can master this essential maintenance skill with ease. Stick around and discover how you can change the oil on your John Deere riding mower like a pro.
By the end of this guide, you’ll have the confidence and know-how to keep your mower in top shape, ensuring a flawless cut every time.
Tools And Materials Needed
Before you start changing the oil on your John Deere riding mower, gathering the right tools and materials is key. Having everything on hand makes the process smoother and prevents unnecessary interruptions. Imagine halfway through the job and realizing you don’t have the correct oil filter or wrench—frustrating, right?
Let’s break down what you’ll need to get the job done efficiently and safely.
Essential Tools For Changing Oil
- Oil Drain Pan:A container to catch the old oil and avoid spills.
- Socket Wrench Set:Needed to remove the drain plug and oil filter. A 13mm or 15mm socket usually fits most John Deere models.
- Oil Filter Wrench:Helps remove the oil filter without damage, especially if it’s tight.
- Funnel:Makes pouring new oil easier and cleaner.
- Clean Rags or Paper Towels:For wiping up drips and cleaning the filter area.
Materials Required For Oil Change
- John Deere Recommended Engine Oil:Check your owner’s manual for the correct type and quantity. Typically, SAE 30 or 10W-30 are common choices.
- New Oil Filter:Using the right filter model ensures proper fit and filtration.
- Gloves:Protect your hands from oil and grime.
- Oil Disposal Container or Bag:To safely transport used oil to a recycling center.
Tips For Preparing Your Workspace
Pick a flat surface to park your mower, so the oil drains completely. Lay down some newspaper or a plastic sheet to protect the ground from spills.
Have good lighting so you don’t miss any drips or leaks. If you’ve ever struggled to see under your mower, you know how much easier this makes the job.
Do you have all these tools and materials ready? If not, gathering them now will save you time and headaches later.
Prepare The Mower
Preparing your John Deere riding mower before changing the oil is crucial for safety and efficiency. Taking a few simple steps ensures the process goes smoothly and avoids potential hazards. Let’s look at what you need to do before lifting the hood and grabbing the oil pan.
Park On A Level Surface
Always position your mower on a flat, stable surface. This prevents the oil from pooling unevenly, giving you an accurate oil level reading later. Uneven ground can also cause the mower to shift unexpectedly while you work, which can be dangerous.
Have you noticed how tricky it gets to check the oil if the mower is tilted? Level ground keeps everything steady and safe.
Turn Off The Engine
Make sure the engine is completely off before starting any maintenance. A hot engine can cause burns, so wait until it cools down if you’ve been mowing recently. This also helps the oil settle at the bottom of the engine for a proper drain.
Taking a moment to cool down your mower might seem like a delay, but it’s a critical safety step you don’t want to skip.
Gather Safety Gear
Put on protective gloves to keep your hands clean and safe from hot oil or sharp parts. Safety glasses are also a good idea to protect your eyes from splashes. Having a rag or paper towels handy will help you quickly clean any spills.
- Disposable gloves or mechanic gloves
- Safety goggles or glasses
- Rags or shop towels
- A container to catch old oil
Wearing safety gear might feel like an extra step, but it prevents accidents that could turn a simple oil change into a frustrating experience.
Drain The Old Oil
Draining the old oil from your John Deere riding mower is a crucial part of the oil change process. It removes dirt, debris, and contaminants that build up over time, helping your engine run smoothly. Taking the time to do this correctly can extend the life of your mower and improve its performance.
Locate The Oil Drain Plug
Start by finding the oil drain plug under your mower. It’s usually a bolt located on the underside of the engine or oil pan. If you’re unsure, check your mower’s manual or look for a plug that’s clearly designed to be removed for draining.
Place A Drain Pan
Before removing the plug, position a drain pan directly beneath it to catch the old oil. Use a pan with enough capacity to hold all the oil, typically around one to two quarts. This step prevents spills and keeps your workspace clean.
Remove The Drain Plug
Use a wrench to carefully loosen and remove the drain plug. Be ready for the oil to start flowing out as soon as the plug is off. If the oil is hot, take extra caution to avoid burns—you might want to let the mower cool down for a bit before this step.
Allow Oil To Fully Drain
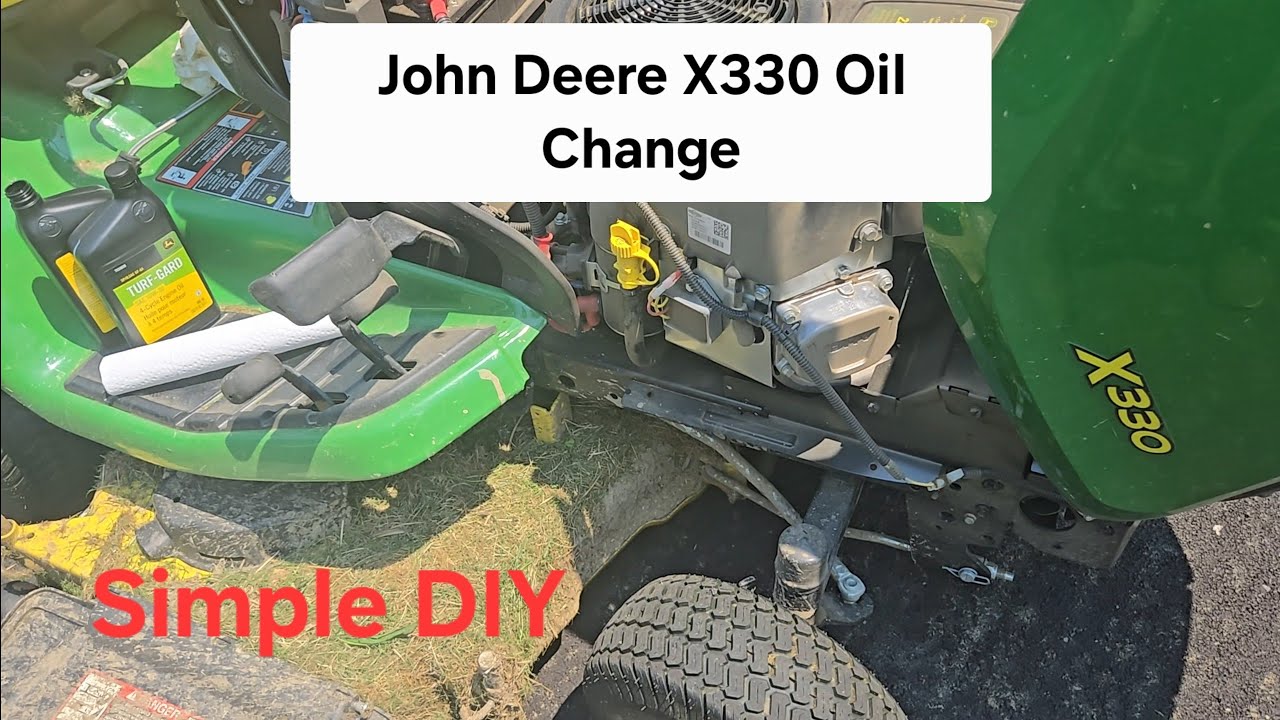
Give the oil plenty of time to drain completely—usually a few minutes. Watch the flow slow to a drip before replacing the plug. This ensures you remove as much dirty oil as possible, making room for fresh, clean oil to do its job well.
Credit: www.youtube.com
Replace The Oil Filter
Replacing the oil filter on your John Deere riding mower is a crucial step to keep the engine running smoothly. The oil filter traps dirt and debris, preventing them from circulating through the engine. Neglecting this part can lead to reduced performance and costly repairs.
Locate The Oil Filter
Start by finding the oil filter on your mower. It’s usually a small, cylindrical part attached to the engine block. If you’re unsure, check your owner’s manual or look for a component that looks like a canister, often painted black or white.
Have you noticed how much easier maintenance is when you know exactly where parts are? Finding the filter quickly saves time and frustration.
Remove The Old Filter
Before removing the filter, place a drain pan underneath to catch any oil spills. Use an oil filter wrench or your hands if it’s not too tight, and turn the filter counterclockwise. Expect some oil to drip out; this is normal but be prepared with rags or paper towels.
Removing the old filter carefully helps avoid damaging the mounting surface. If the filter feels stuck, a little extra force or a specialized tool might be necessary.
Lubricate And Install New Filter
Take your new oil filter and apply a thin layer of fresh oil to the rubber gasket. This lubrication helps create a good seal and makes it easier to remove during the next oil change. Screw the new filter onto the engine by hand, turning clockwise until it’s snug.
Don’t overtighten; hand-tight is usually enough. Have you ever struggled with a filter that was too tight? A gentle touch now saves you trouble later.
Add New Oil
Adding new oil to your John Deere riding mower is a simple but crucial task. Fresh oil keeps the engine running smoothly and extends its life. Follow these clear steps to pour the right oil and check the levels correctly.
Check Oil Specifications
Use the owner’s manual to find the correct oil type and viscosity. John Deere usually recommends specific oils for different models. Using the right oil ensures proper engine performance and protection. Avoid guessing or using any oil you find.
Pour In New Oil
Place a funnel into the oil fill tube to avoid spills. Slowly pour the new oil into the engine. Add a little at a time to prevent overfilling. Keep the mower on a flat surface to get an accurate fill.
Use The Dipstick To Check Levels
Insert the dipstick fully, then pull it out to check the oil level. Wipe it clean and repeat to get a clear reading. The oil should be between the low and full marks. Add more oil if the level is low, but do not overfill.
Credit: www.youtube.com
Clean Up And Dispose Oil
After draining the old oil from your John Deere riding mower, cleaning up and proper disposal are essential. This step keeps your mower in good shape and protects the environment. Take your time to handle the oil and tools carefully. A clean workspace prevents accidents and messes.
Reinstall Drain Plug
Secure the drain plug tightly to stop oil leaks. Use your hand first, then a wrench to tighten gently. Avoid over-tightening, which can damage the threads. Check the plug after a few minutes to ensure it holds firm.
Wipe Excess Oil
Use a clean rag or paper towel to wipe any spilled oil. Clean the area around the drain plug and under the mower deck. Removing oil residue prevents dirt buildup and keeps the mower neat. Dispose of oily rags safely to avoid fire risks.
Proper Oil Disposal Tips
- Collect used oil in a sealed container to avoid spills.
- Do not pour oil on the ground or into drains.
- Take the oil to a recycling center or auto shop.
- Check local laws about used oil disposal for compliance.
- Use gloves to protect your skin during handling.
Test The Mower
After changing the oil on your John Deere riding mower, testing it ensures everything runs smoothly and safely. This step is crucial to catch any issues early, like leaks or low oil pressure, which can cause serious engine damage if ignored. Let’s look at how to properly test your mower before you get back to work.
Start The Engine
Turn the ignition key and start your mower’s engine. Listen carefully for any unusual noises, such as knocking or sputtering, which might indicate a problem with the oil change or engine components.
Keep the mower running for a few minutes to allow the new oil to circulate fully through the engine. This helps confirm the oil is flowing correctly and the engine is well-lubricated.
Check For Leaks
After the engine runs for a bit, stop it and inspect the area under the mower. Look for fresh oil spots on the ground or wet areas around the oil drain plug and filter.
If you spot any leaks, don’t ignore them. Tighten the drain plug and filter gently, but firmly. Loose fittings are often the cause of leaks after an oil change.
Verify Oil Pressure
Some John Deere models have an oil pressure warning light or gauge. Check to see if the warning light stays off and the gauge reads within the normal range while the engine runs.
If your mower doesn’t have a gauge, trust your ears and the engine’s performance. Low oil pressure can cause the engine to run roughly or even stall. If you notice these signs, it’s worth double-checking the oil level and quality immediately.
Maintenance Tips
Proper maintenance keeps your John Deere riding mower running smoothly. Regular oil changes protect the engine and extend its life. Paying attention to small signs helps avoid big problems. Correct storage preserves the mower during off-seasons. Follow these tips to maintain your mower effectively.
Recommended Oil Change Intervals
Change the oil after the first 5 hours of use on a new mower. After that, oil should be changed every 50 hours of operation. For heavy use or dusty conditions, change oil more often. Always use the oil type recommended in the owner’s manual. Clean oil prevents engine wear and keeps performance high.
Signs Of Oil Problems
- Dark, dirty oil indicates it needs changing.
- Oil that smells burnt shows engine stress.
- Low oil level can cause engine damage.
- Excessive smoke from the exhaust may signal oil issues.
- Unusual engine noises can mean oil lubrication is poor.
Storing The Mower
Change the oil before storing the mower for long periods. Run the engine for a few minutes to circulate fresh oil. Clean the mower deck and remove grass clippings. Store the mower in a dry, covered place to prevent rust. Disconnect the battery or use a trickle charger to keep it healthy.

Credit: www.youtube.com
Frequently Asked Questions
How Often Should I Change Oil On John Deere Mower?
Change the oil every 50 hours of use or once per season. Frequent oil changes keep the engine running smoothly and prevent damage. Always check the owner’s manual for model-specific recommendations.
What Type Of Oil Is Best For John Deere Mowers?
Use SAE 30 oil for temperatures above 40°F. Use 10W-30 oil for colder climates. Always choose high-quality, detergent oils that meet John Deere specifications for optimal performance.
How Do I Properly Dispose Of Used Oil?
Collect used oil in a clean container with a tight lid. Take it to a local recycling center or auto shop. Never pour oil on the ground or into drains, as it harms the environment.
Can I Change The Oil Without Special Tools?
Yes, basic tools like a socket wrench and oil pan are enough. Some models may need an oil filter wrench. Refer to your manual to confirm any special tool requirements.
Conclusion
Changing the oil on your John Deere riding mower keeps it running smoothly. Clean oil helps the engine work better and last longer. Follow the steps carefully to avoid mistakes. Regular oil changes save money on repairs later. Keep your mower ready for the next job.
Simple care makes a big difference in performance. Take time to do this task right. Your mower will thank you with reliable power every season.