Are you wondering if your spark plugs are working properly but don’t know where to start? Checking spark plugs with a multimeter is simpler than you think—and it can save you time and money on car repairs.
In this guide, you’ll learn exactly how to test your spark plugs step-by-step, so you can spot problems before they turn into bigger issues. Keep reading to discover the easy way to keep your engine running smoothly and avoid unexpected breakdowns.
Tools Needed
Checking spark plugs with a multimeter requires a few essential tools to get accurate readings and ensure your engine runs smoothly. Having the right equipment on hand not only saves time but also prevents guesswork during diagnostics. Let’s break down what you need before you start testing your spark plugs.
Choosing The Right Multimeter
Your multimeter is the heart of this task. Look for a digital multimeter with a resistance (ohms) measuring feature because spark plug testing revolves around checking resistance levels. A model with a clear display and auto-ranging can make your job easier by showing precise readings without manual adjustments.
Consider durability too. Since you might work in a garage or outdoor setting, a rugged multimeter that can handle drops or dust is a smart choice. Have you ever struggled with a multimeter that gave inconsistent readings? Investing in a reliable brand can save you from frustration later.
Additional Equipment
Besides the multimeter, gather a few more items to streamline the process. You’ll need:
- Insulated glovesto protect your hands when handling spark plugs and wires.
- Screwdriver or socket setto remove spark plugs from the engine.
- Cleaning clothto wipe off dirt and debris from the spark plugs before testing.
- Pen and notebookor a smartphone to jot down your readings for comparison.
Having these tools ready helps you stay organized and speeds up the testing process. Have you prepared your workspace for a smooth and safe inspection?

Credit: www.youtube.com
Preparing The Vehicle
Preparing your vehicle is the first step before testing spark plugs with a multimeter. Proper preparation helps ensure accurate readings and keeps you safe. Taking time to ready your vehicle makes the process smoother and faster.
Ensuring Safety
Turn off the engine completely. Remove the key from the ignition to avoid accidental starts.
Allow the engine to cool down. Spark plugs can become very hot after running.
Wear gloves to protect your hands from dirt and heat. Use safety glasses to shield your eyes from debris.
Disconnect the negative battery cable. This prevents electrical shocks and accidental short circuits.
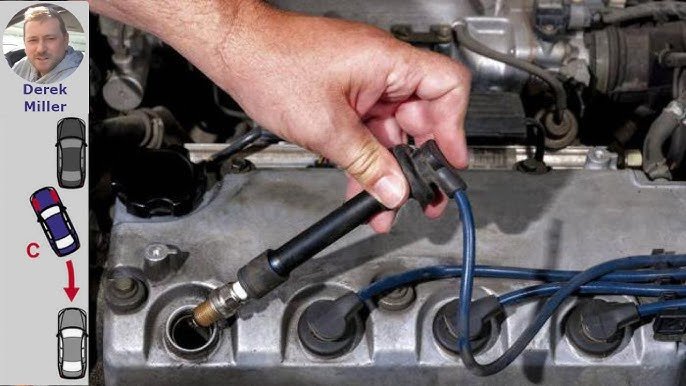
Locating Spark Plugs
Open the vehicle’s hood and find the engine. Spark plugs are usually on the engine’s cylinder head.
Look for thick wires connected to the spark plugs. These are spark plug wires or ignition coils.
Count the number of spark plugs. It matches the number of engine cylinders.
Use a flashlight if the area is dark. This helps you see the spark plugs clearly.
Removing Spark Plugs
Removing spark plugs is a crucial step before you can check them with a multimeter. Doing this properly protects both your engine and the spark plugs from damage. Taking your time and using the right approach will save you frustration and ensure accurate testing results.
Using The Correct Tools
Having the right tools makes removing spark plugs much easier. You will need a spark plug socket, a ratchet wrench, and an extension bar if the plugs are deep inside the engine.
Using a spark plug socket with a rubber insert helps grip the plug without damaging it. Avoid using regular sockets, as they may slip or break the plug’s ceramic insulator.
Also, make sure the ratchet wrench fits well and turns smoothly. This reduces the risk of stripping the spark plug threads, which can cause costly repairs.
Handling Spark Plugs Carefully
Once you loosen the spark plug, handle it gently. Spark plugs are fragile, especially the ceramic part, which can crack easily if dropped or twisted forcefully.
Place the removed spark plugs on a clean, soft surface to avoid contamination or damage. Dirt or oil on the plug can affect your multimeter readings and your engine’s performance.
Think about how you would treat a delicate piece of electronics—your spark plugs deserve the same care. Have you ever tried testing a spark plug that was cracked? It usually leads to inaccurate results and more troubleshooting down the line.

Credit: www.trodo.com
Setting Up The Multimeter
Before you jump into testing your spark plugs, setting up your multimeter correctly is key. A well-prepared multimeter ensures accurate readings, saving you time and frustration. Let’s walk through how to get your device ready for the job.
Selecting The Resistance Mode
Your multimeter has several modes, but for checking spark plugs, you’ll focus on resistance, often marked as “Ω” or “Ohms.”
Turn the dial to the resistance setting to measure how much electrical resistance the spark plug has. This tells you if the plug’s internal wiring is intact or broken.
Some multimeters have multiple resistance ranges. Start with a mid-range setting if you’re unsure, and adjust if the reading seems off. This helps avoid confusing “OL” (overload) displays.
Calibrating The Device
Calibration ensures your multimeter gives true readings. Most digital multimeters don’t require manual calibration, but it’s good to verify accuracy before testing.
Touch the two multimeter probes together. The display should read close to zero ohms. If it doesn’t, use the device’s zero or calibration function if available.
Checking this small detail can prevent misdiagnosing your spark plugs as faulty. Have you ever blamed a part only to find your tool was the real problem? Calibration saves you that headache.
Testing Spark Plug Resistance
Testing the resistance of spark plugs is a straightforward way to check their condition using a multimeter. This test helps you find out if the spark plug’s internal electrode is functioning properly or if it’s damaged or worn out. Knowing how to measure resistance accurately can save you time and money on unnecessary replacements.
Connecting Multimeter Probes
Start by setting your multimeter to the ohms (Ω) setting, usually indicated by the omega symbol. Touch one probe to the top terminal of the spark plug, where the ignition wire connects.
Next, place the other probe on the metal threaded shell of the spark plug. Make sure the probes make solid contact without slipping to get a reliable reading.
Hold the probes steady and avoid touching the metal parts with your fingers, as this can affect the accuracy of the measurement.
Interpreting Resistance Readings
Check the reading displayed on your multimeter. A typical spark plug resistance ranges from 4,000 to 8,000 ohms, depending on the brand and type.
If the reading is significantly higher, it indicates a damaged or faulty spark plug. A reading close to zero or infinite resistance means the spark plug is shorted or broken inside.
Do you know what resistance value your car’s spark plugs should have? Checking your vehicle’s manual can provide the exact range for comparison. This step helps you decide if the plug needs replacement or if it’s still good to go.

Credit: www.hondatwins.net
Identifying Faulty Spark Plugs
Identifying faulty spark plugs is essential for maintaining your engine’s performance. Spark plugs play a crucial role in igniting the fuel-air mixture inside the engine, so any malfunction can lead to poor fuel efficiency and rough engine operation. Knowing how to spot the signs of wear and when to replace these small but vital components can save you time and money on repairs.
Signs Of Wear And Damage
Look closely at your spark plugs for physical signs of damage. Common issues include:
- Carbon fouling:A dry, black soot on the electrode indicates a rich fuel mixture or weak ignition.
- Oil deposits:Oily residue suggests oil leakage into the combustion chamber, often from worn piston rings or valve guides.
- Worn electrodes:Rounded or eroded electrodes reduce the spark’s intensity and can cause misfires.
- Cracked insulator:Visible cracks in the ceramic insulator can cause spark leakage, leading to engine performance issues.
Have you ever noticed your engine hesitating or struggling to start? These symptoms often tie back to spark plug wear that goes unnoticed. Checking the plugs visually can reveal these subtle signs before they become a bigger problem.
When To Replace
Knowing the right time to replace spark plugs depends on several factors:
- Mileage:Most spark plugs last between 30,000 to 100,000 miles depending on the type. Check your vehicle’s manual for specific recommendations.
- Performance issues:Difficulty starting, rough idling, and decreased fuel efficiency often signal it’s time for new plugs.
- Multimeter test results:If your spark plug’s resistance is outside the manufacturer’s specified range, replacement is necessary.
Waiting too long can cause poor combustion, damaging other engine parts. Do you want to risk a costly engine repair just to save a few dollars on spark plugs? Regular checks and timely replacements keep your engine running smoothly and efficiently.
Reinstalling Or Replacing Spark Plugs
Reinstalling or replacing spark plugs requires care and precision. Mistakes during this process can lead to poor engine performance or damage. Paying close attention to how you handle and install each spark plug is key to keeping your engine running smoothly.
Proper Installation Techniques
Before reinstalling, clean the spark plug threads to remove dirt or debris. This helps ensure a tight fit and good electrical contact.
Always start threading spark plugs by hand. This prevents cross-threading, which can damage the cylinder head and lead to costly repairs.
Tighten the spark plug gently at first, then use a wrench to secure it firmly. Avoid over-tightening as it can strip the threads or crack the ceramic insulator.
Have you ever felt unsure about how tight is tight enough? A good rule is to tighten until snug, then give it a quarter to half turn more, depending on the plug type.
Torque Specifications
Each vehicle and spark plug type has specific torque requirements. Using a torque wrench is the best way to achieve the correct tightness without guesswork.
| Engine Type | Torque Range (ft-lbs) | Notes |
|---|---|---|
| Aluminum Cylinder Head | 10-15 | Lower torque to prevent thread damage |
| Cast Iron Cylinder Head | 15-20 | Higher torque allowed due to tougher material |
| Standard Spark Plug | 13-15 | Check manufacturer specs for exact values |
Using incorrect torque can cause issues like poor sealing or difficulty during future removal. Do you check your owner’s manual for torque specs before you start? It’s a small step that saves big headaches later.
Tips For Maintaining Spark Plugs
Maintaining spark plugs is essential for a healthy engine and smooth vehicle performance. Regular care helps avoid misfires and improves fuel efficiency. Simple steps keep spark plugs in good shape and extend their lifespan.
Checking spark plugs with a multimeter is useful, but regular upkeep plays a bigger role. Cleaning and timely inspections prevent dirt buildup and wear. Follow these tips to keep spark plugs working well.
Regular Inspection Schedule
Set a fixed schedule to check your spark plugs. Inspect every 20,000 to 30,000 miles or as recommended by your vehicle manual. Look for signs like corrosion, cracks, or heavy deposits. Early detection of issues avoids engine problems.
- Remove spark plugs carefully to avoid damage.
- Use a multimeter to test resistance and continuity.
- Compare readings with manufacturer specifications.
- Replace plugs that show abnormal readings or wear.
Cleaning Methods
Cleaning spark plugs removes dirt and carbon deposits. Use a soft brush or spark plug cleaner tool. Avoid harsh chemicals that may damage the electrode. Light cleaning can restore performance without replacement.
- Soak plugs in a cleaning solution for a few minutes.
- Gently brush off carbon and dirt.
- Dry thoroughly before reinstalling to prevent moisture issues.
- Check the gap and adjust it if necessary using a gap tool.
Frequently Asked Questions
How Do I Test Spark Plugs With A Multimeter?
Set the multimeter to ohms (Ω) mode. Measure resistance between the spark plug’s center electrode and metal casing. A low or infinite reading means the plug is faulty or worn out.
What Resistance Value Indicates A Good Spark Plug?
A good spark plug typically shows 4,000 to 8,000 ohms resistance. Values outside this range suggest damage or wear, and the plug may need replacement.
Can A Multimeter Detect Spark Plug Fouling?
Yes, a multimeter can help identify fouling by showing abnormal resistance. High or zero resistance readings can indicate carbon deposits or damage on the plug.
When Should I Check Spark Plugs Using A Multimeter?
Check spark plugs if your engine misfires, runs rough, or shows poor fuel efficiency. Regular checks every 30,000 miles help maintain engine performance.
Conclusion
Checking spark plugs with a multimeter is straightforward. This method helps identify faulty plugs quickly. Regular checks ensure your engine runs smoothly. Avoid unexpected breakdowns by maintaining spark plug health. A multimeter is a handy tool for this task. It provides accurate readings.
Remember, clean and functional spark plugs boost fuel efficiency. Always handle them with care to avoid damage. Regular inspections can save you time and money. Keep your vehicle in top condition. Happy driving!


