
Are you experiencing rough engine performance or a noticeable drop in fuel efficiency? It might be time to take a closer look under the hood.
Spark plug wires, though small, play a critical role in your vehicle’s performance. When these wires wear out, they can lead to misfires, poor fuel economy, and even engine damage. The good news? You don’t need to be a seasoned mechanic to tackle this issue.
By learning how to fix a spark plug wire, you can save money, extend your engine’s life, and ensure your car runs smoothly. Ready to roll up your sleeves and get your car back to peak performance? Let’s dive into the step-by-step guide that will have you revving confidently in no time.
Credit: www.youtube.com
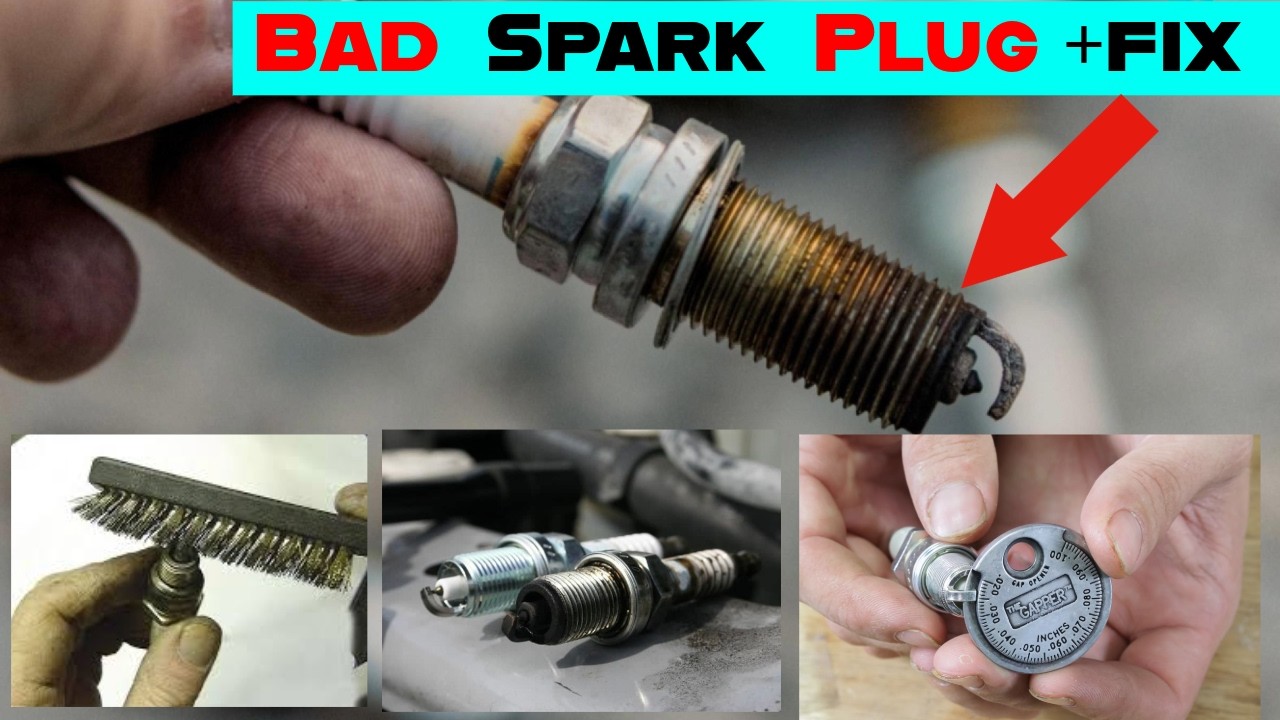
Signs Of Faulty Spark Plug Wires
Recognizing the signs of faulty spark plug wires is crucial for maintaining your engine’s health. These wires carry electrical current to the spark plugs, igniting the fuel-air mixture inside the engine. When they fail, it can cause noticeable problems that you shouldn’t ignore.
Common Symptoms
- Engine Misfires:One of the clearest signs is your engine misfiring or running roughly. You might feel the car hesitate or jerk during acceleration.
- Hard Starting:Faulty wires can make your vehicle difficult to start, especially in cold weather or after it has been sitting for a while.
- Visible Damage:Inspect the wires for cracks, burns, or corrosion. Damaged insulation or exposed wires often indicate a problem.
- Check Engine Light:A malfunctioning spark plug wire can trigger the check engine light, alerting you to an ignition system issue.
Impact On Engine Performance
Bad spark plug wires reduce the efficiency of the ignition system. This leads to poor fuel combustion, which wastes fuel and lowers power output.
Your car might experience decreased acceleration and rough idling. You could also notice increased exhaust emissions, which is harmful to the environment and may cause your vehicle to fail emissions tests.
Have you ever ignored these signs, thinking they were minor? Ignoring faulty wires can cause damage to other engine parts, leading to expensive repairs. Catching the problem early saves you time and money.

Credit: beachautomotive.com
Tools And Materials Needed
Before you start fixing a spark plug wire, gathering the right tools and materials is crucial. Having everything on hand saves time and prevents frustration. It also ensures you do the job safely and correctly.
Essential Tools
- Wire Stripper:Helps remove the insulation without damaging the wire itself.
- Multimeter:Useful for checking the continuity and resistance of the wires.
- Pliers:Needle-nose pliers are ideal for gripping and pulling wires.
- Screwdrivers:Both flathead and Phillips may be needed to remove engine covers or clips.
- Socket Set:Necessary for removing spark plugs if you plan to replace wires and plugs simultaneously.
- Electrical Tape or Heat Shrink Tubing:To insulate and protect repaired wire connections.
I once started fixing a spark plug wire without a wire stripper and ended up nicking the wire, causing more problems. Don’t repeat my mistake—invest in the right tools.
Replacement Parts
- Spark Plug Wires:Always get wires that match your vehicle’s make and model for proper fit and performance.
- Wire Connectors or Boots:These protect the connection points and prevent moisture from causing corrosion.
- Dielectric Grease:Applying a small amount helps prevent electrical shorts and makes future removal easier.
Have you ever wondered why some spark plug wires fail sooner than others? Often, poor-quality materials or incorrect replacements are to blame. Choosing the right parts upfront can save you from repeated repairs down the road.
Safety Tips Before Starting
Before you dive into fixing a spark plug wire, prioritizing safety is essential. Handling car parts can be risky if proper precautions aren’t taken. Protecting yourself and your vehicle ensures the repair goes smoothly and avoids unnecessary hazards.
Disconnecting The Battery
Start by disconnecting the negative terminal of your car’s battery. This step cuts off electrical power and prevents accidental shocks or short circuits while working on the spark plug wires.
Use a wrench to loosen the terminal clamp and carefully remove it. Keep the cable away from the battery post to avoid accidental reconnection. Have you ever felt a sudden shock while working on your vehicle? Disconnecting the battery is the best way to prevent that unpleasant surprise.
Working In A Safe Environment
Choose a dry, well-lit area to work on your car. Wet or dim spaces increase the chances of slipping or making mistakes when handling electrical components.
Wear gloves to protect your hands from sharp edges and chemicals. Also, avoid wearing loose clothing that could get caught in engine parts. Setting up a clean workspace with all your tools within reach helps you stay focused and safe throughout the repair.
Locating Spark Plug Wires
Locating spark plug wires is the first step to fixing them. These wires carry electricity from the ignition coil to the spark plugs. Finding their exact position prevents confusion and helps avoid mistakes. Cars often have several wires that look alike. Taking time to spot and mark each wire saves effort later.
Identifying Wire Positions
Open the car hood and look at the engine. Spark plug wires run from the ignition coil to each spark plug. Each wire connects to a specific plug. They may be arranged in a line or circle. Check the engine manual for your car model to confirm the layout. Look for wires that are thick and insulated. These are usually the spark plug wires.
Marking Wire Connections
Before removing any wire, mark its position. Use colored tape or a marker to label both ends of each wire. Write numbers or letters to match the wires with their plugs. This helps put them back correctly after fixing. Taking photos of the wires before removal can also help. Proper marking prevents engine misfires and keeps the engine running smoothly.
Removing Old Spark Plug Wires
Removing old spark plug wires is a key step in maintaining your vehicle’s engine performance. These wires carry the electrical current from the ignition coil to the spark plugs, igniting the fuel-air mixture. Over time, they wear out and need replacement to keep your engine running smoothly.
Proper Wire Removal Techniques
Start by working on one wire at a time to avoid mixing up the firing order. Gently grasp the boot—the rubber or plastic end that connects to the spark plug—and twist it slightly to loosen the connection. Pull the boot straight off without yanking the wire itself to prevent internal damage.
Using a spark plug wire puller tool can make this process easier and safer, especially if the wires are stuck. Avoid pulling on the wire as this can cause breakage and lead to misfires later on. Have you ever tried to yank a wire only to find it cracked or frayed afterward? That’s exactly what you want to avoid.
Avoiding Damage To Components
Be mindful of the surrounding components like ignition coils, distributor caps, or the spark plug itself. Avoid using metal tools that might scratch or damage these parts. Instead, use your hands or a plastic prying tool designed for automotive use.
Inspect the wires and boots for any signs of corrosion or burning before removing them. Damaged boots can sometimes stick tighter, so applying a small amount of dielectric grease during reinstallation helps prevent future sticking and protects against moisture. What would happen if you accidentally damaged a coil or plug during removal? The repair could become much more expensive and time-consuming.

Credit: www.youtube.com
Inspecting And Testing Wires
Inspecting and testing spark plug wires ensures your engine runs smoothly. Faulty wires cause poor performance and fuel waste. Regular checks help spot issues before they get worse. Simple tools and careful observation reveal most problems.
Visual Inspection Tips
Check wires for cracks, burns, or wear. Look for melted spots or corrosion on connectors. Make sure wires are firmly attached to spark plugs and distributor. Worn insulation can cause shorts and misfires. Clean dirt and oil from wires to see damage clearly.
- Look for cuts or splits along the wire
- Check for stiffness or brittleness in the wire
- Inspect connectors for rust or loose fitting
- Ensure wires are not touching hot engine parts
Using A Multimeter
A multimeter measures wire resistance and continuity. High resistance means a bad wire. Set the meter to ohms (Ω) for testing. Disconnect the wire from the spark plug and distributor. Place meter probes on each wire end. A reading above 10,000 ohms usually indicates a problem.
| Resistance Reading | Wire Condition |
|---|---|
| 0 – 10,000 Ω | Good |
| Above 10,000 Ω | Replace wire |
| Infinite / No reading | Broken wire |
Repeat test for each wire to ensure full engine health.
Installing New Spark Plug Wires
Installing new spark plug wires might seem straightforward, but it requires careful attention to detail. Using the right length and ensuring secure connections can save you from future engine troubles. Let’s break down the key points to get your spark plug wires installed perfectly.
Matching Wire Lengths
Each spark plug wire must match the original wire’s length. Too long or too short can cause poor engine performance or even damage. You can lay the new wire next to the old one to check if they are the same length before installation.
Different cylinders need different lengths, so don’t swap wires between plugs. Have you noticed your engine running rough when wires are mixed up? Keeping the wire lengths accurate is a simple step that prevents this issue.
Connecting Wires Securely
Secure connections are essential for a strong spark and smooth engine operation. Push the wire firmly onto the spark plug and the distributor or ignition coil until you feel it snap or click into place. Loose wires can cause misfires or no spark at all.
Inspect the boot of the wire for any damage before connecting. If the wire feels loose or the boot cracks, it’s better to replace it immediately. How often do you check your spark plug wires for tightness during routine maintenance?
Double-checking Connections
Double-checking the spark plug wire connections is vital for a smooth engine run. Loose or wrong connections cause engine misfires, poor fuel efficiency, and hard starts. Careful inspection of each wire ensures the engine receives the right spark at the right time.
Ensuring Proper Fit
Make sure each spark plug wire fits tightly on the spark plug and distributor cap. A loose wire can slip off during engine vibration. Check for any corrosion or dirt on the wire ends. Clean them if needed to improve the connection. Push the wire on until it clicks or feels secure.
Preventing Crossed Wires
Wires must connect in the correct order to the spark plugs and distributor. Crossed wires cause the engine to run rough or not start. Follow the firing order shown in the vehicle manual. Label the wires or take a photo before disconnecting to avoid confusion. Connect each wire back to its original position carefully.
Testing The Repair
Testing the repair after fixing a spark plug wire is crucial to ensure your vehicle runs smoothly and efficiently. It’s the moment where you get to see if your effort paid off or if you need to revisit the repair. Careful testing can save you time and avoid further engine problems.
Starting The Engine
Once you’ve reconnected the spark plug wire, it’s time to start the engine. Turn the key or press the start button and listen closely. Does the engine crank easily, or does it struggle?
If the engine starts without hesitation, it’s a good sign the wire is properly connected. However, if it hesitates or fails to start, double-check your connections and the wire’s condition. Sometimes a loose connection or a damaged wire can cause starting issues.
Listening For Smooth Operation
After the engine starts, pay attention to how it runs. A repaired spark plug wire should allow the engine to run smoothly without misfires or rough idling.
Listen for any unusual noises like sputtering or jerking. These sounds often indicate the spark plug isn’t firing correctly. If you notice these issues, inspect the wire again for any breaks or poor contacts.
Have you ever noticed your car running rough after a repair? It’s often the small details in wiring that make all the difference. Taking the time to listen carefully can help you catch problems before they get worse.
Maintenance Tips For Longevity
Keeping your spark plug wires in good shape can save you from unexpected breakdowns and costly repairs. Simple care and attention can extend their life much longer than you might expect. Let’s look at how regular maintenance can help you get the most out of your spark plug wires.
Regular Inspection Schedule
Check your spark plug wires every few months or at least twice a year. Look for cracks, burns, or any signs of wear on the insulation. These small damages can cause misfires and reduce engine performance.
Feel the wires while the engine is cool. Any stiffness or brittleness means the wires are aging and need replacement. Don’t wait for symptoms like rough idling or poor fuel efficiency to appear—catch problems early to avoid bigger headaches.
Protecting Wires From Damage
Keep wires away from sharp edges and hot engine parts. Heat shields or wire looms can protect them from excessive heat and abrasion. If you’ve ever had a wire melt or get cut by a loose clamp, you know how frustrating it is.
Also, avoid bending wires sharply when installing or adjusting them. Gentle curves prevent internal damage that you can’t see but will affect performance. Ask yourself: are your wires well-secured and routed safely every time you open your hood?
Frequently Asked Questions
How Do I Know If Spark Plug Wires Are Bad?
Bad spark plug wires cause engine misfires, rough idling, and poor fuel efficiency. Look for visible damage or cracks. Testing resistance with a multimeter confirms wire health. Replacing worn wires improves engine performance and prevents further damage.
What Tools Are Needed To Fix Spark Plug Wires?
You need a ratchet, spark plug wire puller, and replacement wires. A multimeter helps test wire resistance. Gloves protect your hands during removal. Having a service manual for your vehicle model is also helpful.
How Long Does It Take To Replace Spark Plug Wires?
Replacing spark plug wires typically takes 30 to 60 minutes. Time depends on engine accessibility and experience. Working carefully avoids damaging connectors. Following proper wire routing ensures optimal engine performance.
Can I Fix Spark Plug Wires Myself Safely?
Yes, you can safely fix spark plug wires with basic tools. Ensure the engine is cool before starting. Disconnect the battery to avoid shocks. Follow manufacturer instructions to avoid mistakes and ensure proper installation.
Conclusion
Fixing a spark plug wire can save you time and money. Start by checking the wire for cracks or wear. Replace any damaged parts to keep your engine running smoothly. Clean connections help maintain good electrical flow. Regular inspection prevents future problems.
Taking these simple steps improves your car’s performance. Remember, a well-maintained spark plug wire means better fuel efficiency and fewer engine issues. Keep your vehicle in top shape by acting early. Easy to do, and it makes a big difference.
Try these tips and see the results yourself.


