Have you ever found yourself ready to mow the lawn, only to discover your mower battery is dead—and you don’t have the charger? It’s frustrating, right?
But don’t worry, you can still get your mower battery charged without the original charger. You’ll learn simple, safe methods to bring your battery back to life fast. Keep reading, and you’ll never be stuck with a dead mower battery again.
Safety First
Charging a mower battery without a charger can be tricky and even risky if you’re not careful. Safety should be your top priority before attempting any DIY charging method. Taking the right precautions protects you from harm and ensures the battery stays in good condition.
Wear Protective Gear
Always put on protective gear like safety goggles and gloves before handling the battery. Batteries contain acid that can cause burns or eye damage if spilled. Gloves protect your hands from corrosive materials, and goggles shield your eyes from unexpected splashes.
Wearing old clothes or an apron is also a smart idea since battery acid can ruin fabrics. Have a towel or cloth nearby to quickly wipe off any spills. Your safety depends on how prepared you are for accidents.
Work In A Well-ventilated Area
Battery charging releases gases that can be harmful if inhaled in large amounts. Make sure you’re working outdoors or in a space with plenty of fresh air. Avoid cramped spaces where gases can build up and become dangerous.
Have a fan or open windows to keep air moving around you. If you start feeling dizzy or nauseous, step outside immediately. Your health is more important than finishing the task quickly.
Avoid Sparks And Flames
Battery acid is highly flammable, so keep any sparks or open flames far away from your work area. Do not smoke or use devices that could create a spark near the battery. Even a small spark can cause a fire or explosion.
Double-check your tools and cables to ensure they don’t create short circuits. Be mindful of metal jewelry or watches that could accidentally touch battery terminals. Have a fire extinguisher on hand just in case, so you’re ready for emergencies.
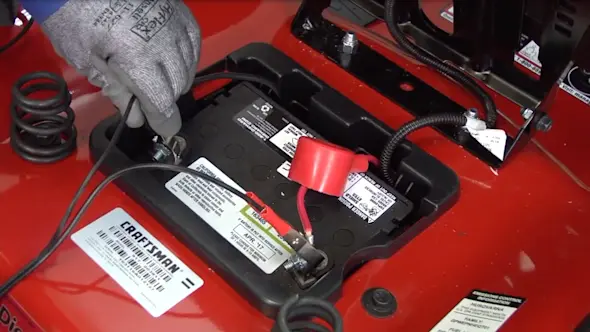
Credit: www.searspartsdirect.com
Identify Your Battery Type
Knowing your mower battery type is important before charging without a charger. Different batteries need different care and methods. Identifying the battery helps prevent damage and improves safety. It also guides you to the right charging technique. This section explains how to recognize common battery types and check their key details.
Lead-acid Vs Lithium-ion
Lead-acid batteries are heavier and bulkier. They often have a plastic case with removable caps. You might see vent holes or small plugs. These batteries contain liquid electrolyte inside. They require careful handling to avoid spills.
Lithium-ion batteries are lighter and more compact. They usually come in sealed cases without openings. These batteries hold more charge and last longer. They also charge faster and do not leak acid. Identifying the battery type helps you choose the safest charging method.
Check Battery Specifications
Look for a label or stamp on the battery. It shows important details like voltage, capacity, and type. Common labels include:
- Voltage (V) – indicates power level
- Capacity (Ah or mAh) – shows how long it lasts
- Battery type – lead-acid, lithium-ion, or others
These specs help match the battery with the right charger or charging method. Always follow the manufacturer’s recommendations for best results.
Use A Car Battery Charger
If you find yourself without a dedicated charger for your mower battery, a car battery charger can be a practical alternative. These chargers are designed to handle lead-acid batteries similar to those in lawn mowers. Using one properly can save you time and money, especially during busy seasons when your mower needs to be ready to go.
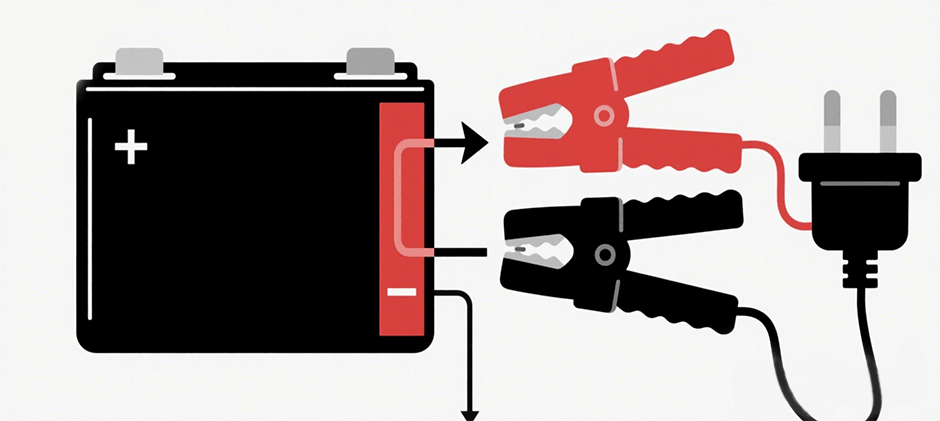
Connecting Properly
Start by identifying the positive and negative terminals on both your mower battery and the car charger. The positive terminal usually has a “+” sign or a red cover, while the negative is marked with a “-” or black cover. Connect the red clamp from the charger to the positive terminal first, then the black clamp to the negative terminal.
Make sure the clamps are secure and not touching each other during the process. Double-check your connections because reversing them can damage your battery or charger. If your charger has a setting for battery type or voltage, set it to match your mower battery for safe charging.
Charging Tips
- Charge your mower battery in a well-ventilated area to avoid buildup of harmful gases.
- Set the charger to a low or trickle charge mode if available. This prevents overheating and extends battery life.
- Keep an eye on the battery temperature; if it feels hot, disconnect the charger immediately.
- Allow the battery to charge fully before disconnecting to ensure optimal performance.
Have you ever thought about how charging speed affects your battery’s lifespan? Slow and steady charging often leads to better long-term results than fast charging. Using a car battery charger with patience can keep your mower ready for many seasons.
Jump-start With A Vehicle Battery
Jump-starting a mower battery using a vehicle battery is a practical way to restore power quickly. This method uses the car’s battery to transfer charge to the mower battery. It requires care and attention to avoid damage or injury. Follow the correct steps to ensure safety and success.
Required Tools
- Vehicle with a fully charged 12V battery
- Set of jumper cables
- Safety gloves and goggles
- Clean cloth to wipe battery terminals
- Wrench or pliers (optional for terminal cleaning)
Step-by-step Process
- Park the vehicle close to the mower without touching them.
- Turn off both the vehicle and the mower.
- Wear safety gloves and goggles before handling batteries.
- Clean the battery terminals on both batteries using a cloth.
- Attach the red jumper cable clamp to the positive (+) terminal of the mower battery.
- Connect the other red clamp to the positive (+) terminal of the vehicle battery.
- Attach the black jumper cable clamp to the negative (–) terminal of the vehicle battery.
- Connect the other black clamp to an unpainted metal surface on the mower frame away from the battery.
- Start the vehicle and let it run for about 5 minutes.
- Try starting the mower. If it starts, keep it running for a few minutes.
- Turn off the vehicle and remove jumper cables in reverse order.
- Store the cables and clean up the workspace.
Solar Panel Charging
Using a solar panel to charge your mower battery without a traditional charger is a smart, eco-friendly choice. It allows you to harness natural sunlight and keep your battery powered even in remote locations. Plus, it’s a hands-on way to understand and control your battery’s charging process.
Selecting The Right Panel
Choosing the correct solar panel is crucial for safe and efficient charging. You want a panel that matches your mower battery’s voltage—usually 12 volts for most lawnmower batteries. Picking a panel with a wattage between 10 to 20 watts is often ideal, as it provides enough power without overwhelming the battery.
Look for panels with built-in charge controllers or consider buying one separately. This prevents overcharging and protects your battery’s lifespan. Also, consider the panel’s size and portability if you plan to move it around your yard.
Setup And Connection
Start by positioning your solar panel in direct sunlight, ideally tilted toward the sun for maximum exposure. Connect the solar panel’s positive lead to the battery’s positive terminal and the negative lead to the battery’s negative terminal.
If you have a charge controller, connect it between the panel and the battery to regulate the flow of electricity. Make sure all connections are secure and insulated to avoid short circuits.
- Check the battery voltage regularly to monitor charging progress.
- Avoid charging in extreme weather to protect your equipment.
- Disconnect the panel once the battery is fully charged to prevent damage.
Have you ever tried using a solar panel for charging? It’s surprising how simple adjustments, like panel angle, can dramatically impact charging speed. Experimenting with your setup not only saves money but teaches you valuable maintenance skills.
Diy Usb Charger Method
DIY USB Charger Method Create a DIY USB charger to power your mower battery. Use a USB cable, cut it, and expose wires. Connect the red and black wires to the battery terminals. This method offers a simple solution when a regular charger is unavailable.
When your mower battery dies and you can’t find the charger, a DIY USB charger might be your solution. Imagine turning everyday tech into a lifesaver for your lawn care needs. This method taps into the versatility of USB power to recharge your mower battery. You’ll discover how simple household items can give your mower a second life. Ready to dive in?Materials Needed
Before starting, gather these essential items:- A USB cable (preferably one you can cut)
- A pair of scissors or a wire stripper
- Electrical tape
- A multimeter (optional, but helpful)
- Alligator clips
- USB power source (like a power bank or laptop)
Charging Procedure
Start by cutting the USB cable to expose the wires inside. You’ll usually find red and black wires; these are your positive and negative connections. Strip the ends of these wires using a wire stripper or scissors. Attach the alligator clips to the stripped ends—red to positive and black to negative. Ensure your USB power source is ready. Plug the USB into the power source and attach the alligator clips to your mower battery’s terminals. If you have a multimeter, use it to check the voltage. This ensures the connection is correct and the power is flowing. As you connect, monitor the battery. Feel the cables to make sure they don’t overheat. Ever thought how a simple USB could power your mower back to life? This method is as easy as charging your phone. Just ensure all connections are secure, and you’ll be cutting grass in no time.Manual Charging Techniques
Manual charging techniques can be a lifesaver when you don’t have access to a traditional charger for your mower battery. These methods rely on simple physical effort and basic tools to generate the electricity needed to recharge your battery. If you’ve ever found yourself stuck with a dead mower battery and no charger nearby, these options could get you back on track without spending money on new equipment.
Using A Hand Crank Generator
A hand crank generator transforms your physical energy into electrical power. By turning the crank, you spin a small generator that produces the current required to charge your battery. It’s a straightforward process, but it does require consistent effort and patience.
To use this method, connect the generator terminals to your battery terminals carefully, ensuring correct polarity to avoid damage. Then, start cranking steadily—think of it as a workout that powers your mower. This technique might not fully charge the battery quickly, but it can provide enough juice to start your mower in an emergency.
Have you ever noticed how some simple tools can make a big difference during a power outage? A hand crank generator is exactly that kind of tool, combining basic mechanics with practical use.
Pedal Power Options
Pedal power uses a stationary bike or a similar setup to generate electricity for your mower battery. By pedaling, you spin a generator connected to the battery, turning your leg power into stored energy. It’s an efficient way to charge without electricity, especially if you already have a bike at home.
Setting this up involves attaching a generator to the bike’s wheel or pedals and wiring it to your battery. Keep in mind that maintaining a steady pedaling speed helps produce a more consistent charge. This method can be surprisingly effective and even doubles as exercise.
Would you be surprised to learn that your fitness routine could also keep your lawn mower ready to go? Pedal power is not just eco-friendly but also a practical backup plan when chargers fail or aren’t available.

Credit: www.tycorunenergy.com
Battery Maintenance Tips
Proper battery care helps your mower last longer and work better. Regular maintenance keeps the battery strong. It also prevents common problems that stop charging. Small actions make a big difference in battery life.
Cleaning Terminals
Dirty terminals cause poor contact and charging issues. Clean terminals with a mixture of baking soda and water. Use a small brush to scrub away corrosion gently. Dry the terminals fully before reconnecting the battery cables. Check terminals often to avoid buildup and keep power flowing.
Storing The Battery Properly
Store the battery in a cool, dry place away from sunlight. Avoid freezing temperatures that can damage battery cells. Keep the battery off the ground on a wooden board or shelf. Charge the battery to about 50% before storing for long periods. Check and recharge every month to prevent deep discharge and damage.

Credit: www.tycorunenergy.com
Frequently Asked Questions
How Can I Charge A Mower Battery Without Its Charger?
You can charge a mower battery using a car battery charger, solar charger, or jumper cables with a running car. Ensure correct polarity and safety precautions to avoid damage or injury.
Is It Safe To Charge Mower Batteries Without The Original Charger?
Charging without the original charger can be safe if you use compatible devices and follow safety guidelines. Always monitor voltage and avoid overcharging to protect the battery.
What Tools Are Needed To Charge A Mower Battery Manually?
You need jumper cables, a car battery charger, or a solar panel with a proper voltage output. Also, have safety gloves and goggles for protection during charging.
How Long Does It Take To Charge A Mower Battery Without A Charger?
Charging time varies by method and battery size but typically takes 4-8 hours using a car charger or solar panel. Always check the battery voltage for readiness.
Conclusion
Charging a mower battery without a charger is possible with care. Use safe tools and follow simple steps to avoid damage. Always check the battery’s condition before starting. Keep the process slow to protect the battery life. This way, your mower stays ready for the next job.
Remember, safety comes first in every step you take. Try these tips when a charger is not available. Your mower will thank you with smooth starts every time.


