Is your mower acting up or refusing to start? The problem might be right under the hood—your battery cables.
Knowing how to replace mower battery cables can save you time, money, and the hassle of a broken-down machine. Imagine getting your mower back to life quickly, without waiting for a mechanic or buying expensive parts. In this guide, you’ll learn simple, step-by-step instructions to fix your mower’s battery cables safely and effectively.
Ready to take control and keep your mower running smoothly? Let’s dive in!

Credit: www.youtube.com
Tools And Materials Needed
Replacing mower battery cables requires specific tools and materials. Using the right items ensures safety and a proper connection. Prepare everything before starting to avoid delays or mistakes. Here is a guide to what you need.
Battery Types And Specifications
Know your mower’s battery type first. Most use lead-acid or lithium-ion batteries. Check the battery voltage, usually 12 volts. Confirm the battery size fits your mower model. Use cables rated for the correct voltage and current. Wrong cables can cause damage or poor performance.
Essential Tools For Replacement
- Safety gloves to protect your hands
- Safety glasses to protect your eyes
- Socket wrench set for removing bolts
- Screwdrivers for terminal screws
- Wire cutters to trim cables
- Wire strippers to remove insulation
- Crimping tool to attach cable connectors
- Multimeter to test voltage and connections
- Replacement battery cables matching specifications
- Electrical tape or heat shrink tubing for insulation
Safety Precautions
Handling mower battery cables requires careful attention to safety. Batteries store electrical energy that can cause sparks or shocks. Taking safety precautions protects you and your mower. Follow these steps before replacing any battery cables.
Disconnecting The Battery Safely
Always turn off the mower and remove the key before starting. Locate the battery and identify the negative (-) and positive (+) terminals. Disconnect the negative terminal first to avoid short circuits. Use a wrench or pliers to loosen the terminal clamps gently. Do not let metal tools touch both terminals at the same time. After removing the negative cable, disconnect the positive terminal carefully. Place the cables away from the battery to prevent accidental contact.
Protective Gear Recommendations
Wear safety gloves to protect your hands from battery acid and sharp edges. Use safety goggles to shield your eyes from sparks or debris. Avoid loose clothing or jewelry that can get caught or cause shorts. Work in a well-ventilated area to prevent inhaling harmful gases. Have baking soda and water nearby to neutralize battery acid spills quickly. Keep a fire extinguisher within reach for emergencies.
Removing Old Battery Cables
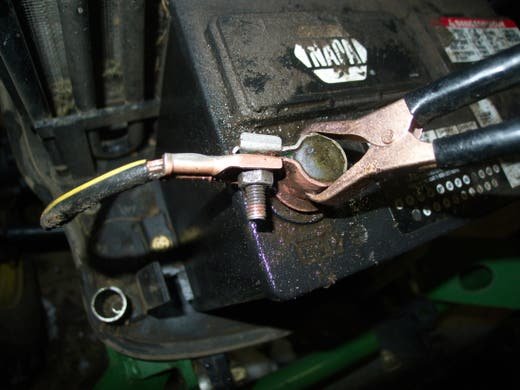
Disconnect the negative cable first to avoid sparks. Loosen the connectors and gently pull off the old battery cables. Inspect for corrosion before installing new cables.
Replacing the battery cables on your mower might seem daunting, but it’s a straightforward task with the right approach. Removing the old battery cables is the first step, and it’s crucial to do it carefully to avoid any mishaps. Proper handling ensures your mower is ready for the new cables, setting the stage for a smooth installation.Locating Battery Cables
Begin by locating the battery cables. Typically, you’ll find the battery under the seat or hood of your mower. If you’re unsure, refer to the user manual for guidance. Check for the red (positive) and black (negative) cables connected to the battery terminals. Identifying these correctly is key to preventing any confusion or errors during removal. Once located, take a moment to ensure there are no obstructions. Clear any debris or tools away from the area for easy access.Loosening Cable Connections
Before loosening the cable connections, make sure the mower is turned off and the keys are removed. This simple step prevents accidental starts and keeps you safe. Using a wrench, start by loosening the nut on the negative (black) cable. Disconnecting the negative cable first reduces the risk of electric shock or short circuits. Next, loosen the positive (red) cable in the same manner. Keep both cables clear of the battery terminals once disconnected. As you work, consider if there’s anything unique about your mower’s setup. Have you noticed any corrosion or wear that might require additional attention? This careful process ensures that your mower is ready for the next step—installing new battery cables. With the old cables safely removed, you’re one step closer to a fully functional mower.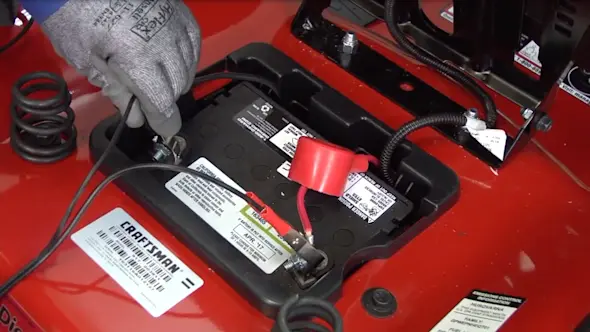
Credit: www.searspartsdirect.com
Preparing New Cables
Preparing new cables is a crucial part of replacing mower battery cables. Getting this right ensures a solid connection and helps your mower start smoothly every time. Skipping or rushing this step can lead to poor performance or even damage your mower’s electrical system.
Measuring And Cutting Cable Length
Start by measuring the distance between the battery terminals and the points where the cables connect. Use a flexible tape measure or a piece of string to get an accurate length. Remember to add a little extra length to allow for movement and easy connections.
Use sharp cable cutters to make a clean cut. Avoid jagged edges, as these can cause poor contact or fraying over time. Have you ever struggled with cables that were too short or awkwardly bent? Taking the time to measure carefully prevents these issues.
Stripping And Cleaning Cable Ends
Next, strip about half an inch of insulation from each cable end using a wire stripper. Be gentle to avoid damaging the copper strands inside. Damaged strands reduce conductivity and might cause your mower to stall unexpectedly.
After stripping, clean the exposed copper with a wire brush or sandpaper. This removes oxidation and ensures a better connection. If you skip this cleaning step, you might experience corrosion that can weaken the electrical flow over time.
Installing New Battery Cables
Installing new battery cables is a key part of mower maintenance. It ensures your mower starts easily and runs smoothly. Proper installation helps avoid electrical problems and extends battery life.
Connecting Positive And Negative Cables
Start by identifying the positive and negative cables. The positive cable usually has a red cover or a plus (+) sign. The negative cable often has a black cover or a minus (-) sign. Connect the positive cable to the battery’s positive terminal first. Then attach the negative cable to the battery’s negative terminal.
Make sure each cable fits snugly on its terminal. Loose connections can cause poor power flow and damage the mower’s electrical system.
Securing Connections For Stability
After connecting the cables, tighten the terminal clamps. Use a wrench to ensure a firm grip, but avoid over-tightening. Too much force can damage the terminals or cable ends.
Check that cables do not move or wiggle. Secure them with cable ties or clamps near the battery. This prevents wear and tear from vibrations while mowing.
Keep cables away from hot engine parts or sharp edges. Proper routing helps maintain cable condition and mower safety.
Testing The Replacement
After replacing your mower battery cables, testing the replacement is crucial to ensure everything works smoothly. This step confirms that the new cables are properly connected and the mower operates as expected. Don’t skip this part; it saves you from unnecessary frustration later.
Starting The Mower
First, sit on the mower and make sure the key is in the ignition. Turn the key to start the engine and listen carefully. Does the mower crank immediately, or do you hear a weak click?
If the engine struggles or doesn’t start, double-check your cable connections. Sometimes a loose connection or a reversed cable can cause starting issues. Tighten the terminals and ensure the positive and negative cables are correctly placed.
Checking For Proper Function
Once the mower starts, observe how it runs for a few minutes. Are the lights bright, and do all electrical components like the ignition and dashboard indicators work properly?
Watch out for any flickering lights or unusual sounds. These could hint at a poor connection or a faulty cable. If everything feels solid, you’ve successfully replaced your battery cables.
Have you noticed how a simple cable replacement can restore your mower’s performance? Testing ensures you get the most out of your repair effort. What’s your biggest challenge when dealing with mower maintenance?
Maintenance Tips
Proper maintenance of mower battery cables helps extend their life and keeps your mower running smoothly. Simple habits protect cables from damage and avoid unexpected breakdowns. Regular care saves time and money on repairs.
Regular Cable Inspection
Check mower battery cables often for signs of wear or damage. Look for cracks, cuts, or frayed wires along the cable length. Make sure cable connections are tight and free from looseness. Loose connections can cause poor mower performance and starting problems.
Inspect the cable insulation to ensure it is intact. Damaged insulation exposes wires and can cause short circuits. Replace cables showing any visible damage immediately to prevent further issues.
Preventing Corrosion
Corrosion on battery cables reduces electrical flow and causes starting problems. Clean cable terminals and connectors regularly to remove rust and dirt. Use a wire brush or sandpaper to gently scrub corrosion away.
Apply a thin layer of petroleum jelly or specialized battery terminal grease to cable ends. This coating blocks moisture and air from causing rust. Store your mower in a dry place to reduce cable corrosion risk.

Credit: www.amazon.com
Frequently Asked Questions
How Do I Know When To Replace Mower Battery Cables?
Replace mower battery cables if you see corrosion, cracks, or fraying. Also, poor mower starting or electrical issues indicate cable problems. Regular inspection helps maintain mower performance and safety.
What Tools Are Needed To Replace Mower Battery Cables?
You need a wrench, wire brush, replacement cables, and safety gloves. A multimeter helps check electrical connections. These tools ensure safe and effective cable replacement.
Can I Replace Mower Battery Cables Myself Safely?
Yes, you can replace cables yourself if you follow safety steps. Disconnect the battery before starting. Use proper tools and avoid short circuits for safe replacement.
How To Prevent Mower Battery Cable Corrosion?
Apply dielectric grease on cable terminals and keep connections tight. Regularly clean terminals with a wire brush. Store the mower in a dry place to prevent moisture damage.
Conclusion
Replacing mower battery cables is simple with the right steps. Always disconnect the battery first for safety. Use the correct tools and follow the guide carefully. Check the new cables for any damage before installing. Tighten connections firmly to avoid loose contacts.
Test the mower after replacement to ensure it starts well. Regular checks help keep your mower running smoothly. Taking these small actions saves time and money later. Now, you can handle cable replacement with confidence. Ready to keep your mower in top shape?


