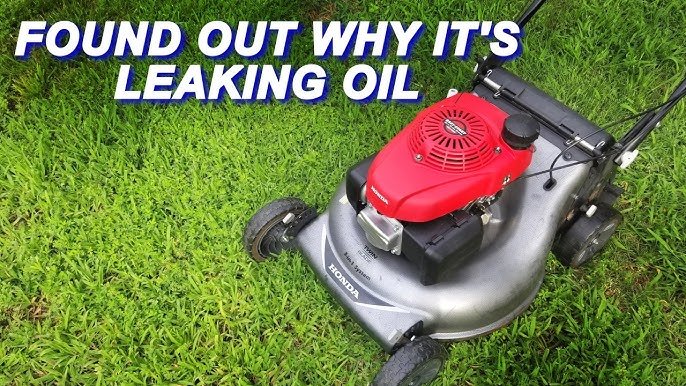
Is your mower leaking oil and leaving a messy trail? This common problem can be frustrating, but you don’t have to replace your whole mower or call a costly repair service.
Fixing a leaking oil seal is easier than you think—and you can do it yourself. In this guide, you’ll learn simple, clear steps to stop the leak and get your mower running smoothly again. Keep reading to save time, money, and avoid future damage to your mower.
Your lawn will thank you!

Credit: www.youtube.com
Identifying Oil Seal Leaks
Identifying oil seal leaks early can save you time and money on mower repairs. Knowing the signs and where to look helps you act before damage spreads. Let’s focus on spotting these leaks accurately so you can maintain your mower’s performance and avoid unexpected breakdowns.
Common Signs Of Leaking
Oil leaks often start small but become noticeable over time. Watch for these signs around your mower:
- Puddles of oilunder the mower after use.
- Dark, wet spotson the mower deck or engine casing.
- Burning oil smellwhen the engine runs, caused by oil hitting hot parts.
- Smokefrom the engine area, especially if oil leaks onto the exhaust.
- Low oil levelsdespite regular top-ups.
Have you noticed oil stains on your driveway or garage floor? That’s often a clear sign your mower’s oil seal might be compromised.
Locating The Leak Source
Finding the exact spot where oil escapes can be tricky but is crucial for an effective fix. Start by cleaning the engine and surrounding areas thoroughly with a rag or degreaser.
Run the mower for a short time to observe fresh oil spots. Pay special attention to these common leak points:
- The area around the crankshaft seal.
- Where the engine block meets the gearbox.
- The oil pan gasket and drain plug.
Use a flashlight to inspect tight spaces and dark corners. Sometimes, oil travels along parts before pooling, so tracing the path backward helps pinpoint the leak.
Tools And Materials Needed
Fixing a mower leaking oil seal requires the right tools and materials. Having these ready helps the repair go smoothly. Each tool and part plays a key role in the process.
Gathering everything before starting saves time. It also prevents frustration from missing items. Below is a list to prepare for the task.
Essential Repair Tools
- Socket wrench set – for removing bolts and screws
- Screwdrivers (flathead and Phillips) – for various fasteners
- Pliers – for gripping and pulling parts
- Hammer – to gently tap components loose
- Oil drain pan – to catch leaking oil safely
- Clean rags – for wiping oil and dirt
- Seal puller or small pry bar – to remove the old oil seal
- Rubber mallet – to install the new seal without damage
- Torque wrench – to tighten bolts to the right specification
Recommended Replacement Parts
- New oil seal – the main part to stop the leak
- Engine oil – to refill after repair
- Gasket or gasket maker – to ensure a tight seal
- Replacement bolts or washers – if old ones are worn out
- Oil filter – consider changing for better engine health
Preparing The Mower For Repair
Preparing the mower for repair is a crucial step before fixing a leaking oil seal. Proper preparation ensures safety and makes the repair process smoother. It also prevents damage to the mower and the environment.
Safety Precautions
Wear gloves to protect your hands from oil and sharp parts. Use safety glasses to shield your eyes from debris. Work in a well-ventilated area to avoid inhaling fumes. Disconnect the spark plug wire to prevent accidental starting. Keep children and pets away from the work area.
Draining The Oil
Place a container under the oil drain plug to catch old oil. Remove the drain plug carefully and let the oil flow out completely. Dispose of the used oil properly at a recycling center. Check the owner’s manual for the correct oil type and amount. Clean the drain plug and reinstall it tightly before starting the repair.

Credit: www.youtube.com
Removing The Old Oil Seal
Removing the old oil seal is a crucial part of fixing a mower leaking oil. It requires patience and the right tools to avoid damaging surrounding parts. If you rush this step, you could cause more leaks or other mechanical problems.
Accessing The Seal
Start by safely positioning your mower to reach the oil seal easily. You might need to tilt the mower or remove some components like the blade or engine cover. Make sure the mower is off and cooled down before you begin.
Look for the oil seal around the shaft or engine housing. Sometimes it’s hidden behind a protective cover or pulley, so check your mower’s manual to know exactly where to find it. Having a clear view will make the removal smoother and prevent any accidental damage.
Careful Seal Extraction
Use a seal puller or a flathead screwdriver wrapped in tape to gently pry out the old seal. Avoid digging too deep or using excessive force, as this can scratch the housing or bend the shaft. It’s better to work slowly and patiently.
Notice how the old seal sits before removal, as this helps when placing the new one. If the seal feels stuck, apply a little penetrating oil around it and wait a few minutes. This small step can save you frustration and keep your mower’s engine intact.
Installing The New Oil Seal
Installing the new oil seal is a key part of fixing a mower leaking oil. This process stops oil leaks and keeps your mower running smoothly. Taking time to install the seal correctly prevents future problems and saves money.
Focus on two main tasks: cleaning the area and placing the seal properly. Clean surfaces help the seal fit tightly. Proper placement ensures the seal works as it should.
Cleaning The Area
Remove all old oil, dirt, and debris from the sealing area. Use a clean rag and a mild solvent to wipe the surface. Make sure the area is dry before continuing. Any leftover grime can cause the new seal to leak. Check for scratches or damage. Smooth out rough spots with fine sandpaper if needed.
Proper Seal Placement
Align the new oil seal carefully with the opening. Do not force it in at an angle. Use gentle pressure to press the seal evenly into place. A seal driver or a flat tool helps to push it down without damage. Check that the seal sits flush with the surface. A misaligned seal will cause leaks and damage the mower.

Credit: www.reddit.com
Reassembling And Testing
Reassembling and testing your mower after fixing a leaking oil seal is a crucial phase. This step ensures everything fits perfectly and the leak has truly stopped. Taking your time here can save you from future headaches and extra expenses.
Reattaching Components
Start by carefully putting back all parts you removed. Clean each component before reattaching to avoid trapping dirt or debris inside. Use the right tools to tighten bolts and screws firmly but avoid overtightening, which can damage seals or threads.
Double-check the placement of the oil seal. If it’s off-center, the leak could return. You might find it helpful to refer to the mower’s manual or take photos during disassembly to guide you.
Checking For Leaks
After reassembly, it’s time to test if the repair worked. Fill the oil to the recommended level and start the mower on a flat surface. Watch closely around the seal area for any signs of fresh oil leakage.
Consider running the mower for about 10 to 15 minutes and then inspect the area again. If you spot oil, don’t ignore it. This could mean the seal wasn’t seated properly or there’s another issue to address.
Have you thought about how small leaks can escalate into bigger problems? Catching them early during testing helps you avoid breakdowns and expensive repairs later on.
Maintenance Tips To Prevent Future Leaks
Regularly check and replace worn oil seals to avoid leaks. Keep the mower clean and store it in a dry place to protect seals from damage. Use the correct oil type and avoid overfilling to maintain seal integrity.
Maintaining your mower to prevent future oil seal leaks is essential for its longevity and performance. Simple, regular checks and good habits can make a significant difference. Here are some practical tips to keep your mower in top shape and avoid those pesky leaks.Regular Inspection
Frequent inspections are key to identifying potential issues before they become major problems. Check the oil seal area for any signs of wear or damage. Look for cracks, dirt buildup, or any unusual oil residue. Set a reminder to inspect your mower every few months. This proactive approach can save you from unexpected breakdowns. Engaging in regular inspections not only extends your mower’s life but also enhances its efficiency.Proper Oil Handling
Handling oil with care is crucial. Always use the correct type and amount of oil as specified in your mower’s manual. Overfilling can lead to increased pressure, causing leaks at the seal. Store oil in a clean, dry place. Contaminants can easily mix with oil, reducing its effectiveness and potentially damaging your mower’s engine. When changing oil, ensure the cap is tightly secured to prevent spills. Have you ever considered how a small oversight can lead to significant issues? By taking simple steps, like checking oil levels and ensuring proper storage, you can avoid unnecessary repairs. Keep your mower running smoothly with these straightforward maintenance tips.Frequently Asked Questions
What Causes A Mower Oil Seal To Leak?
A mower oil seal leaks due to wear, damage, or improper installation. Dirt, heat, and age also degrade the seal. Regular maintenance prevents early leaks.
How Do I Identify A Leaking Mower Oil Seal?
Look for oil spots under the mower, low oil levels, and engine smoke. Inspect the seal area for visible oil residue or damage.
Can I Fix A Mower Oil Seal Leak Myself?
Yes, you can fix it with basic tools. Drain oil, remove the old seal, clean the area, and install a new seal carefully.
How Often Should Mower Oil Seals Be Replaced?
Replace oil seals every 1-2 years or when leaks appear. Frequent use and harsh conditions may require more frequent replacement.
Conclusion
Fixing a mower leaking oil seal keeps your machine running well. Check the seal carefully for cracks or damage. Clean the area before installing a new seal. Tighten bolts evenly to avoid future leaks. Regular maintenance helps prevent oil leaks and engine problems.
With these simple steps, your mower will work longer and better. Save time and money by fixing leaks early. Keep your mower in good shape for every mowing season. Easy to do and worth the effort.


