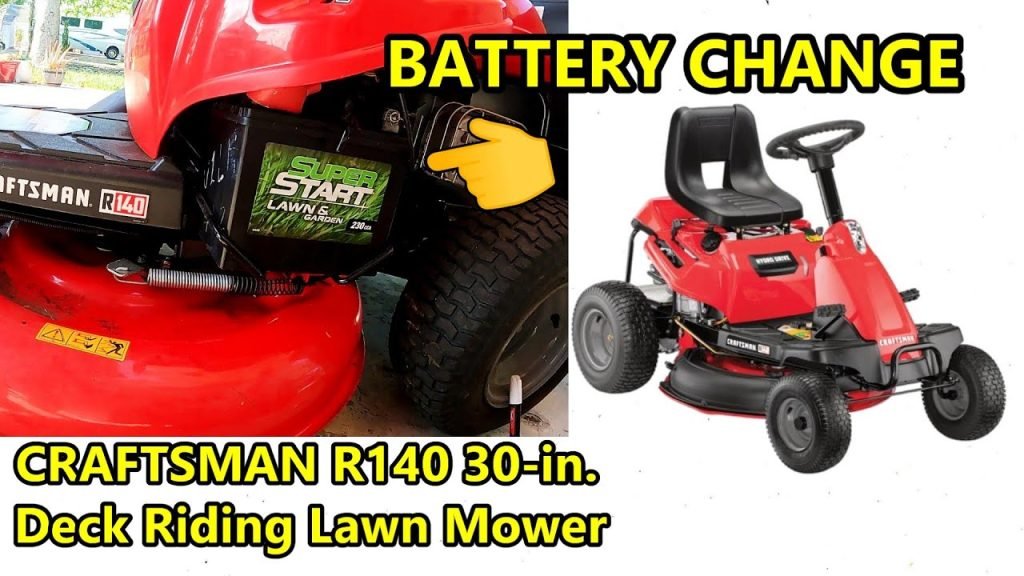
Is your mower’s battery acting up? Changing it might sound tricky, but with the right steps, you can do it safely and quickly.
Imagine never having to worry about a dead battery ruining your day outdoors. In this guide, you’ll learn exactly how to replace your mower battery without any hassle or risk. Follow along, and you’ll save time, avoid common mistakes, and keep your mower running smoothly all season long.
Ready to get started? Let’s dive in.
Prepare For Battery Replacement
Preparing for mower battery replacement sets the foundation for a smooth and safe process. Taking the right steps beforehand can save you time and prevent any accidents. Are you ready to handle this task like a pro?
Gather Necessary Tools
Before you start, collect all the tools you’ll need. Having everything at hand keeps you focused and avoids frustrating interruptions.
- Socket wrench or adjustable wrench:Essential for loosening and tightening battery terminals.
- Screwdriver:Needed if your mower’s battery is secured with screws.
- Gloves:Protect your hands from dirt and battery acid.
- Safety glasses:Shield your eyes from potential sparks or debris.
- Battery terminal cleaner or wire brush:Helps remove corrosion for better connections.
- Replacement battery:Make sure it matches your mower’s specifications exactly.
Double-checking this list can prevent mid-task trips to the store. Have you ever started a job only to realize you’re missing a key tool?
Ensure Safety Precautions
Safety should be your top priority when handling mower batteries. These batteries contain harmful chemicals and can deliver electrical shocks.
- Work in a well-ventilated area:Avoid breathing in any fumes that might escape.
- Turn off the mower:Make sure the ignition is off and the key is removed to prevent accidental starts.
- Disconnect the negative terminal first:This reduces the risk of short circuits.
- Wear protective gear:Gloves and glasses can prevent chemical burns and eye injuries.
- Keep flames and sparks away:Batteries can emit flammable gases, so no smoking nearby.
Have you considered how a small spark could cause serious damage? Taking these precautions seriously will protect you and your equipment.
Credit: www.searspartsdirect.com
Locate The Mower Battery
Locating your mower’s battery is the first and most crucial step to ensure a smooth and safe replacement process. Knowing exactly where the battery sits helps avoid unnecessary damage and saves time. It also gives you a clear idea of what tools and precautions you might need before you start.
Identify Battery Compartment
Most mower batteries are housed in a compartment near the engine or under the seat. Look for a small box-like enclosure with clips or screws holding it shut. If you’re unsure, check your mower’s manual or look for a panel that looks removable without forcing it.
Some models have the battery exposed, while others hide it beneath protective covers. Can you spot any labels or symbols that indicate a battery inside? These clues can guide you quickly to the right spot.
Access Battery Safely
Before touching anything, make sure your mower is completely off and the key is removed if it has one. This prevents accidental starts that could cause injury. Use gloves to protect your hands from dirt and any sharp edges around the battery compartment.
Use the correct screwdriver or tool to open the compartment carefully. Avoid rushing or using excessive force to prevent damage to the casing or wiring. If the battery is secured with clips, gently release them rather than prying.
Have you noticed any corrosion or buildup around the battery terminals? It’s a sign to clean carefully once you access the battery, which improves connection and extends battery life.
Disconnect The Old Battery
Disconnect the mower’s old battery by removing the negative cable first. This prevents electrical shocks and sparks during replacement. Always use tools carefully to avoid damage.
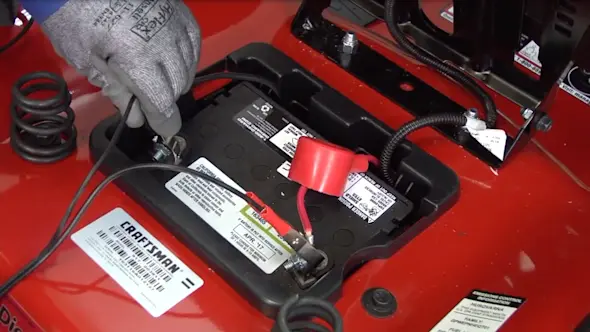
Changing your mower battery safely is crucial. Disconnecting the old battery is the first step. Safety comes first, so ensure the mower is off. Wear protective gloves and goggles. This protects you from sparks and acid. Follow these steps to disconnect the old battery.Remove Negative Cable
Start by locating the negative cable. It is usually black. It connects to the negative terminal marked with a minus (-) sign. Use a wrench to loosen the nut on the cable. Gently slide the cable off the terminal. This step prevents any electrical shock.Remove Positive Cable
Next, find the positive cable. It is typically red. It attaches to the positive terminal marked with a plus (+) sign. Use your wrench again to loosen the nut. Carefully remove the cable from the terminal. Ensure it does not touch any metal parts.Take Out The Battery
Now, the battery is free to remove. Grip the battery with both hands. Lift it straight up and out of the mower. Keep your back straight to avoid injury. Set the old battery aside safely. It should be disposed of properly later.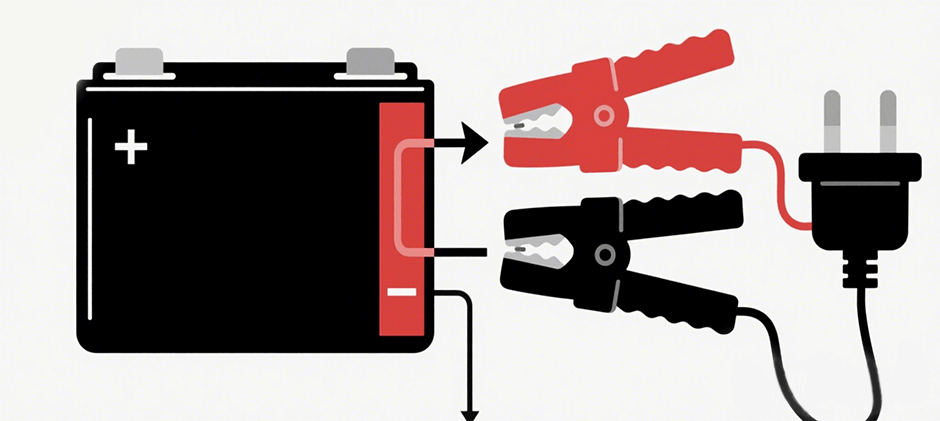
Credit: www.fridayparts.com
Install The New Battery
Installing the new battery in your mower is a crucial step that demands attention to detail and safety. Getting this right ensures your mower starts smoothly and operates efficiently. Let’s look at how you can position and connect your new battery properly to avoid any issues.
Place New Battery Correctly
First, position the new battery into the mower’s battery tray exactly how the old one was placed. Make sure it sits flat and fits snugly without any wobbling. A secure placement prevents vibration damage and ensures proper contact with the terminals.
Look for any clips or brackets that hold the battery in place and fasten them firmly. If your mower has a plastic cover, don’t forget to put it back on for extra protection. Have you checked that the battery terminals are facing the right direction before moving on?
Connect Positive Cable
Next, connect the positive cable, usually marked with a red cover or a plus (+) sign. Attach it firmly to the positive terminal of the battery. Loose connections here can cause starting problems or even sparks, so tighten the clamp securely.
Use a wrench to snug the connection but avoid over-tightening, which can damage the terminal. It’s helpful to clean the terminal with a wire brush first if there’s any corrosion. Have you noticed the difference a clean terminal makes in your mower’s performance?
Connect Negative Cable
Finally, connect the negative cable, often black or marked with a minus (-) sign, to the negative terminal. This completes the electrical circuit necessary for your mower to function. Just like the positive side, ensure the clamp is tight and free of rust or dirt.
Connecting the negative cable last reduces the risk of accidental short circuits during installation. Double-check all connections before closing the battery compartment. How confident do you feel about handling these connections safely now?
Test The New Battery
Testing the new battery is a crucial step after installation. It confirms that your mower will start reliably and run smoothly. Skipping this step might leave you stranded when you need your mower the most.
Start The Mower
Once the new battery is connected, turn the key or push the start button. Listen carefully to how the engine reacts.
- If the engine cranks strongly and starts quickly, your battery is doing its job.
- If it struggles or doesn’t turn over, double-check the battery connections and charge level.
Remember, a new battery should give your mower a powerful start without hesitation. Have you ever been surprised by a weak start after replacing a battery? It’s often due to loose connections or an uncharged battery.
Check For Proper Operation
After the engine starts, let it run for a few minutes. Pay attention to any unusual sounds or erratic behavior.
- Check if the mower’s lights and other electrical components work correctly.
- Look for warning lights on the dashboard, which might signal electrical issues.
If everything functions smoothly, your new battery installation was successful. If not, it might be worth testing the battery’s voltage with a multimeter or consulting a professional. How confident are you in spotting subtle signs of battery or electrical trouble?

Credit: www.youtube.com
Maintain Mower Battery Health
Maintaining your mower battery’s health is key to ensuring it performs well and lasts longer. A healthy battery means fewer interruptions while you’re working outside and less frequent replacements. Taking a little time to care for your battery can save you both money and hassle down the road.
Regular Cleaning Tips
Keep your battery terminals clean to avoid corrosion, which can reduce battery efficiency. Use a mixture of baking soda and water with a soft brush to gently scrub the terminals if you notice any buildup. After cleaning, dry the terminals thoroughly and apply a thin layer of petroleum jelly or terminal protectant spray to prevent future corrosion.
Don’t forget to check the battery case for cracks or leaks. A damaged case can cause acid leaks, which are dangerous and will damage your mower’s electrical system. Regularly wiping the battery with a damp cloth to remove dirt and grime also helps maintain good contact and performance.
Proper Storage Advice
If you won’t be using your mower for a while, such as during winter, proper storage of the battery is essential. Remove the battery from the mower and store it in a cool, dry place to prevent moisture damage and temperature-related wear.
Keep your battery partially charged during storage; a fully drained battery can become permanently damaged. Using a smart battery charger designed for lawn mower batteries can help maintain the correct charge without overcharging. Have you checked your battery’s charge level before storing it last time? It’s a simple step that makes a big difference.
Frequently Asked Questions
How Do I Safely Disconnect A Mower Battery?
To safely disconnect a mower battery, first turn off the mower and remove the key. Always disconnect the negative (black) cable before the positive (red) cable. This prevents electrical shorts and sparks, ensuring safety during battery removal or replacement.
What Tools Are Needed To Change Mower Battery?
You typically need a wrench or socket set to loosen battery terminals. Safety gloves and goggles are recommended to protect against acid spills. A battery terminal cleaner helps ensure good electrical contact when installing the new battery.
How Often Should I Replace My Mower Battery?
Mower batteries usually last 3 to 5 years depending on usage and care. Replace the battery if you notice slow starts, corrosion, or if it fails to hold a charge. Regular maintenance can extend battery life.
Can I Charge A Mower Battery Instead Of Replacing It?
Yes, many mower batteries can be recharged using a compatible battery charger. Charging restores power if the battery is discharged but not damaged. However, replace the battery if it no longer holds a charge after multiple attempts.
Conclusion
Changing your mower battery safely keeps your equipment working well. Always wear gloves and eye protection. Disconnect the negative terminal first to avoid sparks. Use the right tools and handle the battery carefully. Dispose of old batteries at proper recycling centers.
Regular battery care extends mower life and saves money. Stay safe and keep your mower ready for any lawn task. Simple steps make a big difference in safety and performance.


